Feeds:
Posts
Comments

Archive for the ‘One Dish’ Category

Over the last few years I have gotten into the habit of making a pot of vegetarian chili for myself when I’m making traditional chili for Brandon. It’s not that I don’t enjoy beef-based chili but I try to be mindful of my meat intake and chili is a meal where I don’t miss it at all. I also find it extremely easy to make two separate batches because the base exactly the same, I just added the butternut squash in place of ground beef in my veggie variation.

I think I have finally perfected my chili recipe. This is my go-to and it always turns out delicious. I’m not much of a leftover fan but I’ve had this for dinner three times this week and I’m still craving more. It also freezes well for an easy dinner later down the road. This veggie chili is healthy and very satisfying. I like to top mine with cheese, plain Greek yogurt and sliced avocado along with a warm slice of cornbread or cheesy beer bread on the side!

Vegetarian Butternut Squash and Bean Chili
(A Bakin’ and Eggs Original)

Ingredients:

1 tablespoon olive oil
1 large onion, diced
1 green pepper, diced
1 jalapeno pepper, diced
2 cloves garlic, crushed and minced
2-3 tablespoons chili powder (to taste)
1 teaspoon cumin
1/2 teaspoon cayenne pepper
1 teaspoon kosher salt (or more to taste)
2 cups uncooked butternut squash, peeled and cubed (1-inch cubes)
1 (28-ounce) can petite diced tomatoes
1 (15-ounce) can black beans, drained and rinsed
1 (15-ounce) can dark red kidney beans, drained and rinsed
1 (15-ounce) can filled 3/4 with water
1 tablespoon cocoa powder

Directions:

Heat olive oil in a large pot over medium heat. Sauté onions, peppers and jalapeño until mixture become soft. Add garlic and sauté for another minute or two. Add spices and continue to sauté for another minute. Add squash, tomatoes, beans and water and bring to a simmer. I usually simmer covered on low heat for 60-90 minutes and then uncovered on low heat for 30-60, depending on how much time I have and how thick I want my chili. The longer you simmer it uncovered, the thicker it will get. Add the cocoa powder in 10-15 minutes before serving and stir well.

Yield: 8 servings

Read Full Post »

There are a few foods that are dinner staples in our house. We can’t seem to go a week or two without having them. Pizza, pasta and Mexican are three of the things you’ll find us eating frequently. (And coincidentally all feature carbs and/or cheese!)

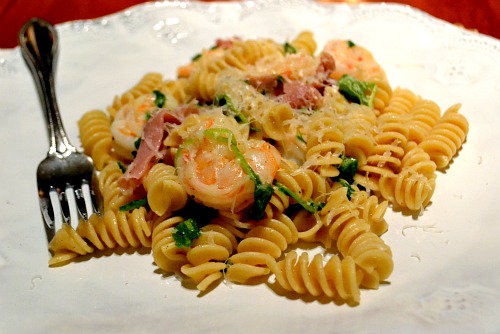
We decided on pasta last night but wanted to try a new recipe. Typing “pasta” into the search box on Epicurious yields overwhelming results so in order to focus us a bit more, I gave Brandon The Gourmet Cookbook to browse through. He came up with a Penne with Arugula and Prosciutto that sounded great and featured a 20 minute start to finish time. This was perfect since we weren’t able to start on dinner until after 8 p.m.

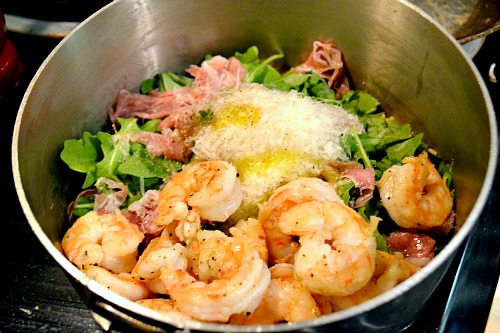
We made a few modifications to the original recipe. The biggest was the addition of shrimp which we both agreed really took the dish up a notch. Overall, this is a very simple recipe but each element plays a big part in the flavor, especially the arugula. Don’t skip it.

While the pasta was boiling, I sauteed the shrimp in olive oil with a little bit of a lemon pepper rub (Dizzy Pig Shakin’ the Tree). Once the pasta and shrimp were done, I drained the pasta and dumped all the ingredients into the pot with the pasta. After a stir and a generous crank of salt and pepper it was time to eat.

I served this  dish with a hunk of bread and olive oil dipping sauce. At one point I said, “Mmm…I love carbs.” aloud. We’re happy to have another pasta dish worth repeating (over and over again) in our repertoire!

Pasta with Shrimp, Arugula and Prosciutto
(Recipe adapted from The Gourmet Cookbook)

Ingredients:

1/2 pound pasta (half box) pasta, penne, corkscrew, etc.
1/2 pound shrimp, peeled and deveined
Seasoning of your choice for the shrimp (salt and pepper, lemon pepper, etc)
1/4 pound thinly sliced proscuitto, chopped
3/4 to 1 pound arugula, stems removed, chopped roughly (I used about 1/2 of a clamshell container)
1/2 cup finely grated parmigiano-reggiano
3/4 teaspoon grated lemon zest
1 quarter lemon, squeezed
2-3 tablespoons olive oil
Salt and pepper, to taste

Directions:

Cook pasta in a large pot of boiling salted water according to package directions. Reserve 1/2 cup cooking water and drain pasta.

While pasta is cooking, sautee shrimp over medium high heat with olive oil and seasoning of your choice. This should take about 3-4 minutes, total.

Return pasta to pot and toss with prosciutto, shrimp, arugula, cheese, lemon zest, lemon juice and salt and pepper to taste. Add some of the pasta water if it seems dry.

Yield: 2-3 servings

Read Full Post »

I recently received the Canyon Ranch: Nourish cookbook from one of the readers of my healthy living blog. It is a beautiful cookbook full of delicious and healthy recipes. Brandon and I have both skimmed through the book and I’m pretty sure that we want to make every single thing in it!

I was feeling a chicken dish for dinner tonight and this recipe for Rustic Chicken sounded perfect given the blast of winter weather that we’re experiencing. Last week it was 80 degrees, this weekend it is 40 and raining…go figure. I am ready for spring to be here to stay!

This Rustic Chicken is simple and comforting but still elegant and flavorful with the addition of fresh herbs and a nice mixture of vegetables. I made a some changes to the original recipe, including adding carrots and parsley and subbing oregano for the sage. Next time I will use chicken cutlets rather than full breasts because I think they will absorb more flavor and we found we didn’t need a whole breast with all the other elements of the dish.

One Year Ago: Baby Greens with Warm Goat Cheese
Two Years Ago: Simple Broiled Mahi

Rustic Chicken
(Recipe adapted from Canyon Ranch: Nourished)

Ingredients:

3 tablespoons extra virgin olive oil, divided
1/4 cup shallots, sliced thinly
1 cup seasonal wild mushrooms, sliced (I used white and baby portobello)
1 1/2 cups frozen pearl onions
1 cup baby carrots
2 cups chicken stock
1/4 teaspoon fresh rosemary, chopped
1/4 teaspoon fresh oregano, chopped
1 teaspoon sea salt
1/4 teaspoon freshly ground black pepper
4 cups cooked pasta
1/4 teaspoon sea salt
1/4 teaspoon freshly ground black pepper
4 4-ounce boneless, skinless chicken breasts

For garnish: grated Parmesan cheese and chopped parsley

Directions:

Season chicken breasts generously with salt and pepper. In a large sauté pan, over medium heat, heat one tablespoon of oil. Sauté chicken breasts for 5-6 minutes per side or until browned and internal temperature reads 160 degrees. Remove from heat and cover loosely to keep warm.

Add remainder of oil to pan and saute shallots, mushrooms, onions and carrots for 8-10 minutes, or until shallots are translucent and mushrooms are soft. Add chicken stock, deglaze pan and reduce liquid by half.  Add rosemary and oregano and season with salt and pepper. Add pasta and toss together until well combined.

Evenly divide the pasta mixture into 4 bowls.  Top each serving with a chicken breast and sprinkle with grated cheese and parsley.

Yield: 4 servings

Read Full Post »

We really enjoy noodle bowl creations but usually lean towards broth-based, curry flavored noodle bowls. This recipe caught my attention because I have never cooked with soba at home and it seemed healthy and satisfying. I’m in the midst of a 10 day break from meat so I added this vegetarian dish to this week’s menu.

Soba noodles are Japanese thin noodles made from buckwheat flour. They are high in fiber contain all eight amino acids, making them a great source of vegetarian protein. I experienced some difficulty finding them in my normal store – they carried them but they were out of stock at two different stores. Brandon stopped by Earth Fare and discovered they had several different brands. If your local grocery doesn’t carry them check an Asian market or a health foods store or substitute whole wheat spaghetti.

I was drawn to two different recipes – I liked the dressing from Annie’s Eats and the vegetable mixture for the noodles from a Gourmet recipe. I decided to combine the recipes and was pleased with the results. I also think this would be delicious with tofu or chicken added to the mix.

Add this to your weekly menu plan as a meatless main! It’s easy, healthy and flavorful!

One Year Ago: Kefta and Zucchini Kabobs
Two Years Ago: Indian Spiced Chicken Burgers

Spicy Soba Noodles with Edamame, Mushrooms and Cabbage
(Inspired by Annie’s Eats and Gourmet)

Ingredients:

FOR THE DRESSING
1/2 cup reduced sodium soy sauce
1/4 cup water
1 tablespoon sesame oil
1 tablespoon canola oil
2 tablespoons rice wine vinegar
1 clove garlic, minced
4 green onions, chopped
2-3 teaspoons chili garlic sauce
1 tablespoon brown sugar

FOR THE NOODLES
2 tablespoons sesame seeds
1 tablespoon canola oil
2 tablespoons peeled ginger, chopped
1 clove garlic, minced
10 ounces fresh mushrooms, stemmed and thinly sliced (shiitake or button)
1 pound Napa cabbage, thinly sliced (5-6 cups)
2 green onions, sliced
8 ounces soba
1 cup frozen shelled edamame

Directions:

FOR THE DRESSING
In a medium bowl, whisk together all ingredients and set aside.

FOR THE NOODLES
Toast sesame seeds in a large, heavy skillet (not nonstick and with no oil) over medium heat. Stir often and cook until pale golden. Transfer to a small bowl.

Heat oil in a skillet over medium-high heat. Saute mushrooms, stirring frequently, until they start to brown, about 4 minutes. Add ginger and garlic and cook for another 2 minutes. Reduce heat to medium and add cabbage and scallions. Cook, stirring occasionally, until cabbage is crisp but tender, about 6 minutes. Add sauce and simmer for another 2 minutes.

While the cabbage is cooking, cook the soba and edamame together in a large pot of boiling salted water. Cook until noodles are just tender, about 5-6 minutes. Drain and rinse under cool water.

Transfer noodles to a large bowl and toss with sesame seeds and vegetable mixture.

Yield: 4 servings


Read Full Post »

Winter has arrived in the Carolinas in full force. It is freezing but I won’t complain about the temperatures because I know I have many readers who live in cold, snowy climates…I don’t know how you do it! One thing I will say is that cold days and even colder nights make me crave warm, hearty dishes like soup. I’ve had this Curried Coconut Soup with Chickpeas bookmarked for months and the perfect opportunity finally arose to make it on a chilly night when Brandon was out to dinner with friends.

I didn’t know how receptive Brandon would be to the soup. While he loves curry dishes, I didn’t know if he’d go for a vegan soup for dinner so I made it on a night he wasn’t home. I loved cooking this dish. It was so fragrant and very easy. I was extremely pleased with the results – the soup was flavorful and filling. I am happy to report that Brandon loved the leftovers for lunch the next day. I will definitely be adding this soup to the “winter warmers” recipe collection.

A few notes about the recipe…I almost doubled the curry powder and could have gone for a bit more. If you are a curry lover don’t be afraid to be a bit heavy handed. Next time I make this I am going to experiment with adding other spices like cayenne pepper to up the spice factor and cumin or coriander. This recipe was great as written but I would love to play with developing the flavors a bit more.

One Year Ago: Pork Chops with Cider Cream Sauce and Sauteed Apples
Two Years Ago: Greek Pasta

Curried Coconut Soup with Chickpeas
(Recipe source Epicurious, March 2009)

Ingredients:

2 tablespoons canola or olive oil
1 medium onion, diced
1 medium red bell pepper, diced
1 jalapeño chili, seeded, minced
2 large cloves garlic, minced
2 cups low-sodium vegetable broth
1 (15-ounce) can chickpeas, rinsed and drained
1 cup chopped tomatoes, seeded and peeled, fresh or canned
1-2 teaspoons mild curry powder, to taste
1/2 teaspoon salt, or to taste
Freshly ground black pepper, to taste
1 (14-ounce) can light coconut milk
3/4 cup cooked white or brown rice, cooked
2 tablespoons fresh cilantro or parsley, chopped

Directions:

Heat the oil over medium heat. in a medium stockpot. Add onion, bell pepper and chili and cook, stirring, until softened, about 5 minutes. Add the garlic and cook for another 1 minute, stirring constantly. Add the curry powder and stir until onion mixture is coated. Add broth, chickpeas, tomatoes, salt and black pepper. Bring to a boil over high heat. Reduce the heat and simmer gently, uncovered, stirring occasionally, about 10 minutes. Add the remaining ingredients and cook, stirring occasionally, until heated through, about 5 minutes. Serve hot.
Yield: 4 servings

Read Full Post »

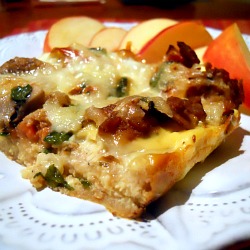
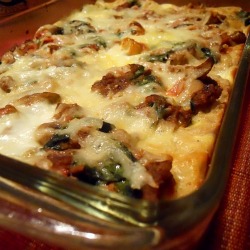
Dinner tonight was supposed to be broiled mahi, roasted asparagus and sweet potato parsnip puree. There was a midafternoon change of plans when Brandon informed me that he just did not feel like eating fish tonight. He is fighting a cold (that I may or may not have given him…oops) and was in the mood for something simple and comforting. I decided to do a spin on breakfast for dinner and made a healthier version of a traditional breakfast casserole.

This casserole features whole wheat English muffins, a few veggies, faux sausage, eggs and cheese. I got the idea for this dish from the Whole Foods website but winged it in the kitchen. The original recipe instructs you to let this sit overnight in the fridge but a one hour soak worked for us. I was able to quickly assemble this before yoga this evening and Brandon put it in the oven so that dinner was ready when I got home from class. Easy and delicious.

If you’re looking for a healthier alternative to cheese, sausage and bacon laden casseroles this holiday season I encourage you to try this recipe! I think you could further lighten it by using a mixture of eggs and egg whites and reducing the cheese. But we loved it just the way it was…a little cheese never hurt anyone!

One Year Ago: Buttermilk Biscuits and Jeweled Rice

English Muffin Egg Casserole
(Recipe inspired by Whole Foods Market)

Ingredients:

4 whole wheat English muffins, halved
2 meatless sausage patties (I used Morningstar)
1 tablespoon olive oil
1 medium tomato, chopped
3/4 cup mushrooms, sliced
1 clove garlic, minced
1 cup spinach, chopped
1/2 teaspoon dried basil
5 eggs
1/3 cup skim milk
1 cup mozzarella cheese, shredded
Lots of salt and pepper, to taste

Directions:

Prepare an 11 x 9 baking dish with cooking spray. Line with English muffin halves and set aside.

Defrost sausages in microwave and crumble. Heat olive oil in a large skillet over medium heat and add tomatoes and mushrooms. Cook for 3-4 minutes and then add sausage and garlic. Cook for another 2-3 minutes and then stir in chopped spinach and dried basil. Season generously with salt and pepper and then spoon over English muffins.

While mixture is cooling on English muffins, whisk together eggs and milk and season with salt and pepper. Pour egg mixture over English muffins and top with cheese. Let rest at least one hour or up to overnight in the fridge.

Remove casserole from fridge while you are preheating oven to 350 degrees. Cook for 40-50 minutes, or until set and cheese is slightly browned.

Yield: 6 servings

Read Full Post »

I am not exaggerating when I say that I have no reason to ever try another chicken and dumplings recipe. This one is going straight to the “tried and true, will make this for years and years to come” file. I have tried a lot of chicken and dumplings recipes and have never been blown away by any of them – except for this Chicken Pie With Biscuit Crust but it’s not truly chicken and dumplings.

I was in the mood to cook on Saturday afternoon. I wanted to make a dinner that would take a while so that I could spend the evening hanging out in the kitchen, one of my favorite activities to relax and unwind. I chose this recipe from Tyler Florence because I loved that it featured homemade stock, sauce and dumplings. No canned stock, cream of yuckiness soup or refrigerated biscuits.

I made the stock by placing an organic/free range chicken in a pot with garlic, peppercorns, thyme and salt. I covered the chicken with water and boiled. This was a great reminder that homemade stock is easy and far superior in flavor to what you buy in the store. While I am guilty of buying stock, I will be trying to keep some homemade stock in the freezer moving forward. I only used about half the stock this rendered in the chicken and dumplings so I was able to freeze a good amount of leftovers!

I put Brandon to work shredding the cooked chicken while I prepared the sauce. I sauteed carrots, celery and garlic in a mixture of butter and oil and then added in flour to make a roux. I slowly incorporated the chicken stock and then added in extra veggies. I love that this recipe includes peas and pearl onions. The sauce simmered until it was thickened. You get a nice creaminess with the sauce by adding a little heavy cream at the end. Side note: please remember to taste your sauce as you go and season – you might need to add a good bit of salt.

Soon enough it was time to add the chicken and dumplings and sit back and watch magic happen. I love dropping the dough in and then seeing it turn into perfect dumplings.

While this is a labor intensive recipe, it is not hard. I highly encourage you to try this now that the temperatures are dropping and the leaves are turning. This dish is so comforting and it just feels good to eat it knowing that everything is made from scratch.

One Year Ago: Peanut Butter Chocolate Chip Banana Muffins

Chicken and Dumplings
(Recipe source Tyler Florence)

Ingredients:

FOR THE CHICKEN AND STOCK
1 (3 to 3 1/2 pound) whole organic chicken
2 bay leaves
6 sprigs thyme
4 to 5 black peppercorns
1 head garlic, split through the center (leave garlic unpeeled)
2 tablespoons kosher salt
Enough water to cover chicken

FOR THE DUMPLINGS
2 cups all-purpose flour
1 tablespoon baking powder
1 teaspoon salt
2 eggs
1/4 cup chopped chives
3/4 to 1 cup buttermilk

FOR THE SAUCE
2 tablespoons butter
2 tablespoons oil
2 carrots, diced
2 stalks celery, diced
2 cloves garlic, minced
2 bay leaves
1/4 cup all-purpose flour
6 cups chicken stock
1 cup frozen peas
1 cup frozen pearl onions
1/4 cup heavy cream
Freshly ground black pepper, for garnish
Chopped chives, for garnish

Directions:

FOR THE CHICKEN AND STOCK
Place the chicken and all stock ingredients in a large Dutch oven and cover with water. Bring water to a boil over medium-high heat and then reduce to a simmer.  Cook for one hour until the chicken is tender and internal temperature registers at least 165 degrees. Skim the surface of fat as it cooks.

Remove chicken from pot and place on a cutting board. Let rest until it is cool enough to handle. Strain the stock and set aside. When chicken has cooled, shred and set aside.

FOR THE DUMPLINGS
Sift the dry ingredients together in a large bowl. In a small bowl, using a whisk, lightly beat the eggs, chives and buttermilk together; pour the liquid ingredients into the dry ingredients and gently fold. Mix just until the dough comes together; the batter should be thick and cake-like.

FOR THE SAUCE
In a Dutch oven, over medium heat, add the butter and oil. Add the carrot, celery, garlic and bay leaves and saute until the vegetables are soft, about 5 minutes. Stir in the flour to make a roux and continue to stir for two minutes to coat the veggies in flour and remove the starchy taste. Slowly pour in the chicken stock, 1 cup at a time, stirring well after each addition. Add frozen peas and pearl onions.

Let sauce simmer, stirring occasionally, until it is thick enough to coat the back of a spoon, about 15 minutes. Stir in heavy cream.

Fold the reserved shredded chicken into the sauce and bring to a simmer. Using 2 spoons, carefully drop heaping tablespoonfuls of the dumpling batter into the hot mixture. The dumplings should cover the top of the sauce, but should not be touching or crowded. Let the dumplings poach for 10 to 15 minutes until they are firm and puffy. Discard the bay leaves, season with freshly cracked black pepper and garnish with chopped chives before serving.

Yield: 6-8 servings

You can become a fan of Peanut Butter Runner and Bakin’ and Eggs on Facebook!

Read Full Post »

I blogged about making Shaksuka on my healthy living blog a few nights ago. I was surprised that it received a lot of positive feedback and quite a few people have indicated that they would like to make this dish.

A very quick overview of Shaksuka for those who didn’t read my post earlier this week. Shaksuka is a vegetarian dish of Moroccan/Israeli/Egyptian origins. It’s traditionally served as a breakfast item. It’s a spicy tomato broth with poached eggs. The dish is very quick and easy to make and also healthy. I served the Shaksuka with homemade pita bread for dipping. I had the leftovers the next night for dinner and the flavors were even better after they had a chance to develop.

I followed a recipe from Smitten Kitchen with a few modifications. First, I used three jalapeno peppers because I was looking for heat in this dish. I find jalapenos to be pretty hit or miss with the spice level but luckily the ones I picked up at the store were nice and hot. Second, I reduced the garlic to two large cloves. I knew that the five the original recipe called for would be way too much for us. And last, I added turmeric in with the spices. While reading about Shaksuka online I noticed that turmeric was a common ingredient but SK’s recipe didn’t call for it. I have a whole jar in my pantry and love finding ways to use it due to its known anti-inflammatory powers.

This is a fun dish for vegetarians and those who love to try new ethnic recipes.

One Year Ago: Incredulada Enchiladas (one of my”biggest hit” recipes!)

Shaksuka
(Recipe adapted from Smitten Kitchen)

Ingredients:

2-3 tablespoons olive oil
3 jalapeño chiles, stemmed, seeded and finely chopped
1 small yellow onion, chopped
2-3 cloves garlic, minced
1 teaspoon ground cumin
1 teaspoon turmeric
1 tablespoon paprika
1 28-ounce can whole peeled tomatoes, undrained
Kosher salt, to taste
6 eggs (I only used 4 because there was just no reason to use 6 for the two of us)
1/2 cup feta cheese, crumbled
1 tablespoon chopped flat-leaf parsley
Warm pitas, for serving

Directions:

Heat olive oil in a 12-inch skillet (that has a lid – don’t use it now) over medium-high heat. Add jalapenos and onions and cook, stirring occasionally, until soft and golden brown, about 6 minutes. Add garlic, turmeric, cumin and paprika, and cook, stirring frequently, until garlic is soft, about 2 more minutes.

Put tomatoes and their liquid into a medium bowl and crush with your hands or place in food processor and pulse a few times. Add crushed tomatoes and their liquid to skillet along with 1/2 cup water. Reduce heat to medium and simmer, stirring occasionally, until thickened slightly, about 15 minutes. Season sauce with salt.

Crack eggs over sauce, cover skillet and cook until yolks are just set, about 5-7 minutes. Using a spoon, baste the whites of the eggs with tomato mixture, being careful not to disturb the yolk. Sprinkle shakshuka with feta and parsley and serve with pitas, for dipping.

Yield: 4 servings

Read Full Post »

One of my favorite mostly vegetarian blogs is Branny Boils Over. When I saw her blog and rave about chana masala, I knew it was something that I must try. For some reason the stars just didn’t align on this one and it took me months to finally get around to cooking it. I ended up making the chana masala on a really random night – Brandon was out of town and I had a terrible cold. But for some reason Indian food sounded like something that would warm my soul and make me feel better.

This is the perfect vegetarian dish – tons of flavor and protein and very satisfying. I served the chana masala over brown rice with naan on the side for scooping. I fed Brandon leftovers when he got back in town and even he was impressed. This dish has been added to the ever expanding list of vegetarian favorites in our house. I’ve really been cutting back on my meat consumption over the last couple years (I probably only eat meat/seafood 2-3 times per week and never for breakfast or lunch) and meals like this make it so easy to forget the meat.

One Year Ago: Fruit Skewers with Vanilla Cream Cheese Dip

Chana Masala
(Recipe adapted from Branny Boils Over and Smitten Kitchen)

Ingredients:

1 tablespoon olive oil
1 medium onion, diced
1 clove garlic, minced
2 teaspoons fresh ginger, grated
1 tablespoon ground coriander
2 teaspoons ground cumin
1/2 teaspoon ground cayenne pepper
1 teaspoon ground turmeric
2 teaspoons paprika
1 teaspoon garam masala
1 (15-ounce) can diced tomatoes (juices included)
2/3 cup water
4 cups cooked chickpeas or 2 (15-ounce) cans chickpeas, drained and rinsed
1/2 teaspoon salt
1/2 lemon (juiced)

Directions:

Heat oil in a large skillet over medium heat. Add onion and saute for about 5 minutes, until softened. Add garlic and ginger and saute for another 2-3 minutes.  Turn heat down to medium-low and add the coriander, cumin, cayenne, turmeric, paprika and garam masala. Cook onion mixture with spices for a 1-2 minutes and then add the tomatoes. Add the water and chickpeas. Simmer uncovered for 10 minutes, then stir in salt and lemon juice.

Serve over rice or with naan (or both!).

Yield: 4-6 servings

Read Full Post »

I know the first thing that a lot of readers are thinking is, “What in the world is tempeh?” so let’s cover that first! I read a lot of healthy living blogs and saw several bloggers eating tempeh regularly. As a lover of alternative proteins and grains, I had to give it a try. The best overview I found was from The George Mateljan Foundation.

“Although not a common item in most households in the United States, tempeh, with its distinctively nutty taste and nougat-like texture, is increasing in popularity. It easily absorbs the flavors of the other foods with which it is cooked making it adaptable to many types of dishes. Tempeh can be found in health food stores and specialty markets throughout the year.

Tempeh has been a staple in Indonesia for over 2000 years. It is a highly nutritious fermented food traditionally made from soybeans and its high protein content makes it a wonderful substitute for meat.”

For more information on tempeh, including nutrition breakdown, check out their site.

I picked some Lightlife Organic Tempeh at Harris Teeter. I was surprised that it was so easy to find at my normal grocery. I decided to try a recipe from Whole Foods for Roasted Tempeh and Sweet Potatoes. I thought that for my first time trying tempeh, it would be best to make it as part of a dish. Some of the hardcore bloggers eat it raw but I’m not there yet!  🙂

The verdict? I really enjoyed it and have made it again several times since. I loved topping a salad with the leftovers. My husband, however, was not such a fan. He ate it (I’m so lucky – he will try anything!) but I don’t think he’ll be requesting it again. I think it’s one of those foods you either like or don’t care for – it definitely has a unique taste and texture – but if you are conscientious about your meat intake and looking for new sources of protein, I definitely recommend trying tempeh.

Roasted Sweet Tempeh and Sweet Potatoes
(Recipe source, Whole Foods)

Ingredients:

1/4 cup reduced-sodium tamari
1 tablespoon mirin (sweet Japanese cooking wine)
1/2 teaspoon granulated garlic, garlic powder or 1 large garlic clove, minced
1/2 teaspoon onion powder or 1/4 cup onion, minced
1 teaspoon toasted sesame oil
1 (8-ounce) package tempeh, diced
2 medium sweet potatoes (about 2 pounds), peeled (optional) and diced
2 teaspoons extra virgin olive oil
1/8 teaspoon ground ginger
1/8 teaspoon ground cinnamon
1 tablespoon canola oil
Salt and pepper to taste
2 tablespoons parsley, chopped

Directions:

In a shallow dish, whisk together tamari, mirin, granulated garlic, onion powder and sesame oil. Add tempeh, toss to coat, cover and set aside to let marinate for 30 minutes at room temperature. While tempeh is marinating, toss sweet potatoes with olive oil, ginger, cinnamon and 1 1/2 tablespoons of the marinade from the tempeh. Set aside.

Preheat oven to 350 degrees.

Heat canola oil in a large skillet over medium heat. Drain tempeh and then place in skillet. Cook, turning frequently, until golden brown, 5 to 7 minutes. Transfer to a 2-quart baking dish and toss with sweet potatoes, salt and pepper. Cover with foil and bake until sweet potatoes are tender, 30 to 35 minutes. Garnish with parsley and serve.

Yield: 6 side dish servings or 3 main dish servings

And if you’re looking for more ideas on how to use tempeh, check out Cate’s World Kitchen and Whole Foods.

Read Full Post »

Older Posts »