Feeds:
Posts
Comments

Posts Tagged ‘Dessert’

I am very easily persuaded when it comes to baking. Last Sunday Brandon suggested that I bake cookies or brownies for dessert and I immediately agreed that it was a fabulous idea. I started flipping through cookbooks to find a new recipe that I could blog about and I’m here to say that I found a winner.

I love the Southern Living Cookbook. It’s one of those cookbooks that never fails me…I can always find something delicious to make from it. The second I saw these white chocolate brownies, I knew that I’d found my dessert.

Brownies are a staple in our dessert rotation but always in the traditional chocolate form. I loved the idea of having a white chocolate base. Brandon had the genius idea of adding toffee. The results were perfect – the white chocolate was the star and the toffee added the perfect compliment. I loved the slight saltiness that the toffee provided.

Top with ice cream and chocolate sauce for extra deliciousness!

White Chocolate Toffee Brownies
(Recipe adapted from The Ultimate Southern Living Cookbook)

Ingredients:

1/3 cup unsalted butter
8 ounces white chocolate, chopped and divided
2 large eggs
2/3 cup sugar
1 cup all-purpose flour
1/2 teaspoon baking powder
1/4 teaspoon salt
1 teaspoon vanilla
1/4 cup toffee

Directions:

Preheat oven to 350 degrees and grease and 8 x 8 pan.

Melt butter in a small saucepan over low heat. Add 4 ounces of white chocolate and remove from heat. Do not stir the butter and chocolate. Allow chocolate to slowly melt.

Beat eggs at medium speed with an electric mixer until thick and pale, about 1-2 minutes. Slowly add the sugar, beating well.

In a separate bowl, whisk together flour, baking powder and salt. Gradually add to egg mixer, mixing until just blended. Stir in white chocolate and vanilla. Fold in remaining chopped white chocolate and toffee.

Pour mixture into prepared pan and bake for 30-35 minutes.

Yield: 2 dozen squares

Read Full Post »

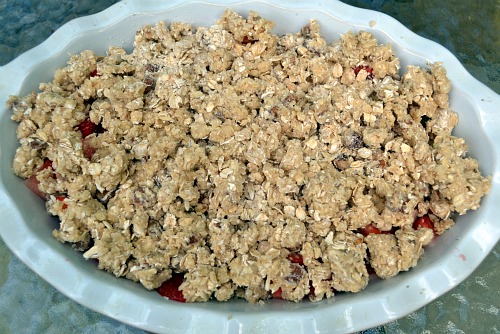
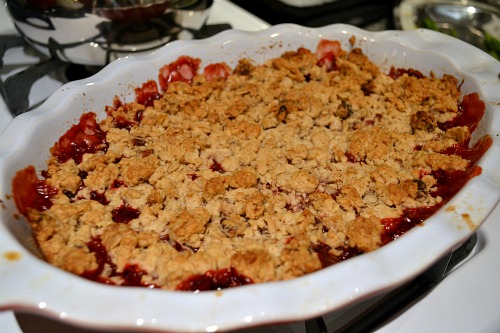
Recently I found myself with a fridge full of strawberries and the desire to make a dessert other than strawberry shortcake with them. Since I am a firm believer all fruit can be made even more delicious by topping it with a crunchy topping and serving it warm with a scoop of ice cream, I decided to try a crisp. (Case in point here and here.)

Off to the internet I went in search of a recipe. I was surprised to find that strawberry crisp recipes were scarce. Most involved the addition of rhubarb, which I was not interested in. So I did what any food blogger with an idea in their head would do, combined a couple of recipes to create exactly what I was looking for.

The results were wonderful! The strawberries were warm and sweet with a nice consistency and the topping was a great combination of a buttery oat mixture with toasted pecans.

We took the crisp to a friend’s house for a dinner party and it was a huge hit. And just as I expected, it was even better with a scoop of vanilla ice cream. Don’t miss out on this one while strawberries are in season!

Strawberry Crisp
(Recipe adapted from The Gourmet Cookbook and Culinary Concoctions by Peabody)

Ingredients:

FOR THE BERRIES
3 cups strawberries, hulled and sliced
1/3 cup granulated sugar
1 tablespoon lemon juice
1 1/2 tablespoons cornstarch

FOR THE TOPPING
1 cup oats
3/4 cup all purpose flour
1 stick butter, chilled and cut into small pieces
1 cup brown sugar
1/4 teaspoon salt
1/4 teaspoon cinnamon
1/4 cup pecans, chopped

Directions:

Butter an 8 x 8 baking dish or small oval baker. Preheat oven to 325 degrees.

Mix together strawberries, sugar, lemon juice and cornstarch. Set aside.

Whisk together flour, brown sugar, cinnamon and salt in medium bowl. Add butter and mix in with your fingertips until mixture sticks together in clumps. Stir in oats and nuts.

Place strawberry mixture in prepared baking dish and crumble topping over. Bake for 40-50 minutes or until topping is browned and strawberries are bubbly.

Yield: 6-8 servings

Read Full Post »

Pound cake is one of my favorite no-fuss desserts. It’s simple, easy and versatile. Pound cake also reminds me of my grandmother, who taught me that it’s a perfectly acceptable breakfast treat. 😛

I was flipping through the March issue of Southern Living and came across this recipe for Lemon Coconut Pound Cake. I just happened to have all of the ingredients on hand in my kitchen so 10 minutes later I found myself baking. I had the cake in the oven in less than 15 minutes and it smelled wonderful while it was baking.

I was extremely pleased with both the texture and flavor of this cake. Sometimes pound cakes can be a bit dry but this one was soft and moist. I attribute the great texture to the use of yogurt in the batter. The lemon coconut flavor provided the perfect Spring twist on pound cake.

We ate this plain and it was delicious but it would also be nice with a glaze or with berries and fresh whipped cream. Make this cake a must on your Spring dessert rotation!

Lemon Coconut Pound Cake
(Recipe heavily adapted from Southern Living)

Ingredients:

1/2 cup unsalted butter (1 stick), softened
1 1/3 cups granulated sugar
3 large eggs
1 1/2 cups all-purpose flour
1/2 teaspoon salt
1/8 teaspoon baking soda
1/2 cup plain Greek yogurt or sour cream
2 teaspoons lemon zest
1 tablespoon lemon juice
1/2 cup sweetened flaked coconut, plus extra for topping cake

Directions:

Preheat oven to 325 degrees. Butter and flour a 9 x 5 loaf pan. Stir together flour, salt, and baking soda and set aside.

In a stand mixer fitted with the paddle attachment or using a hand mixer, beat butter at medium speed until creamy, about 2-3 minutes. Slowly add sugar, beating until fluffy and lightened in color. Add eggs, 1 at a time, beating just until blended after each addition.

Alternate adding flour mixture and yogurt to butter mixture, beginning and ending with flour. Beat at low speed just until blended after each addition. Stir in lemon zest, lemon juice and 1/2 cup coconut. Pour batter into a greased and floured 9- x 5-inch loaf pan.

Bake for 1 hour and 5 minutes to 1 hour and 15 minutes or until a long wooden pick inserted in center comes out clean. (Mine took closer to an hour and 15.) Cool in pan on a wire rack for 10 to 15 minutes and then remove from pan to wire rack, and cool completely (about 1 hour).

Yield: 8 servings

Read Full Post »

Last week Charlotte was hit with a heavy dose of winter weather. In the South, this brings your daily routine to a screeching halt. I found myself unable to navigate my way anywhere but into the kitchen. Given the fact that I tend to keep myself insanely busy and overcommited, I have to admit that it was nice to be forced to slow down.

Instead of working late and hitting the gym, I baked cookies and made a big batch of chili. I tend to always make the same cookies – chocolate chip, oatmeal chocolate chip or oatmeal raisin. I wanted to make something new that I hadn’t baked or blogged about before. I browsed through my favorite go-to cookbook, The Gourmet Cookbook, and decided to try the Oatmeal Trail Mix Cookies. Brandon was not on board with the raisins that the recipe called for, I wasn’t on board with the shortening and I didn’t have peanuts so I made a few substitutions to the original recipe.

Despite the substitutions, these cookies turned out great. One thing I was surprised to discover is that these needed to bake a little longer. I usually under bake cookies but that was not the case with this recipe. I under baked my first batch and the texture just wasn’t right. I baked the second batch a little longer and they were right on. Also, I liked these better cool than hot out of the oven. Usually we love warm cookies, and these were plenty good warm, but even more outstanding once they’d cooled.

These Oatmeal Coconut Chocolate Chip Cookies are the perfect way to put a different twist on the traditional chocolate chip or oatmeal cookie recipe.

One Year Ago: Overnight Baked French Toast
Two Years Ago: Penne a la Betsy

Oatmeal Coconut Chocolate Chip Cookies
(Recipe adapted from Gourmet)

Ingredients:

1 stick (1/2 cup) unsalted butter, softened
1/2 cup firmly packed light brown sugar
1/4 cup granulated sugar
1 large egg
1/2 teaspoon baking soda dissolved in 1 tablespoon warm water
1/2 cup plus 2 tablespoons all-purpose flour
1/2 teaspoon salt
1/2 teaspoon vanilla extract
1 1/2 cups old-fashioned rolled oats
1/2 cup sweetened flaked coconut
6-ounces semisweet chocolate chips
1/3 cup pecans, chopped

Directions:

Preheat oven to 375 degrees.

In the bowl of a stand mixer fitted with the paddle attachment or in a large bowl using an electric mixer, cream the butter and sugars together on medium high speed. Beat in the egg, baking soda mixture, flour, salt and vanilla. Reduce speed to low and mix in oats, coconut, chocolate chips and pecans.

Drop rounded tablespoons of the dough onto greased baking sheets about 4 inches apart and with a fork flatten and spread each mound into a round, about 3 inches in diameter.

Bake the cookies in batches in the middle oven for 8 to 10 minutes, or until they are golden. Transfer to racks and let cool.

Yield: about 30 cookies

Read Full Post »

I attended my first holiday cookie exchange last week and the stakes were high considering our group was made up of Charlotte-area food and healthy living bloggers. I knew that I was going to bring my tried and true Orange Cranberry White Chocolate Biscotti but I also wanted to bring something a little more Christmas-esque. After a bit of research, I decided that these Chocolate Peppermint Bark Cookies would be perfect.

These cookies feature melted high-quality chocolate topped with crushed peppermints and a drizzle of white chocolate over a shortbread base. Although these cookies require multiple steps, they were fairly simple. I struggled most with the shortbread cookie dough. It stuck to my fingers as I tried to press it into the pan. The key to avoiding this was keeping my fingers wet with water. I was concerned that the shortbread wouldn’t cook properly but it turned out just right.

The cookies were a big hit at the party and the presentation was beautiful for the holidays. This recipe will definitely be a repeat for many holiday seasons to come. I thinke these cookies would be perfect in holiday gift bags too!

One Year Ago: Chili Lime Tilapia
Two Years Ago: Open-Faced Steak Sandwiches with Horseradish Sauce

Chocolate Peppermint Bark Cookies
(Recipe source Bon Appetit)

Ingredients:

Nonstick vegetable oil spray
2 cups all-purpose flour
1/4 teaspoon salt
1 cup (2 sticks) unsalted butter, room temperature
1 cup sugar
1 teaspoon vanilla extract
1 large egg yolk
6 ounces high-quality bittersweet or semisweet chocolate, chopped
1/2 cup (about 3 ounces) finely chopped red-and-white striped hard peppermint candies or candy canes
2 ounces high-quality white chocolate (such as Lindt or Perugina)

Directions:

Preheat oven to 350 degrees. Spray a 13 x 9 inch baking pan with nonstick spray. Line bottom of pan with a long strip of 9-inch-wide parchment paper, leaving an overhang on both short sides of pan.
Whisk flour and salt in medium bowl. Using a hand-held electric mixer or stand mixer fitted with the paddle attachment, beat butter in large bowl until creamy, about 2 minutes. Gradually beat in sugar and continue beating until mixture is light and fluffy, stopping occasionally to scrape down sides of bowl, about 3 minutes. Beat in vanilla, then egg yolk. Gradually add flour mixture, beating on low speed just to blend.

Drop dough by tablespoonfuls into prepared baking pan, spacing evenly. Using moistened fingertips, press dough to form even layer over bottom of pan. Pierce dough all over with fork.

Bake cookie base until light golden brown, slightly puffed and edges begin to come away from sides of pan, about 30 minutes. Place pan on wire rack and immediately sprinkle bittersweet chocolate over. Let stand until chocolate softens, about 3 minutes. Using a small offset spatula, spread chocolate over top of cookie in a thin even layer. Immediately sprinkle chopped peppermint candies over.

Stir white chocolate in a medium metal bowl set over saucepan of simmering water until melted and smooth. Remove from water and use a fork to drizzle the white chocolate all over cookies. Chill until white chocolate is set, about 30 minutes.

Grab the paper overhang and lift from pan. Transfer to work surface and using a large knife, cut cookie into irregular pieces.

Yield: about 36 pieces

Read Full Post »

First, my apologies for my recent lack of posts. I was busy running the Marine Corps Marathon! Check out my race recap on my healthy living blog. Now that marathon training is over, you can expect more regular posts. I am looking forward to spending lots of time in the kitchen this winter.

Now, on to tasty treats! I don’t bake biscotti often but when I do it’s because I’m sending a package with baked goods. Biscotti holds up extremely well when shipped so I usually include it in my Operation Baking Gals packages and when I send treats to my grandmother. Biscotti is one of her favorites.

Biscotti can seem a little intimidating or time consuming because there are multiple steps and you have to bake it twice but it really is a simple process. If you’ve resisted trying to make biscotti at home, give it a try!

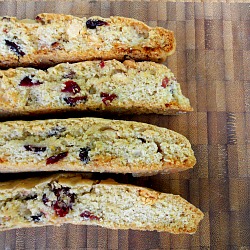
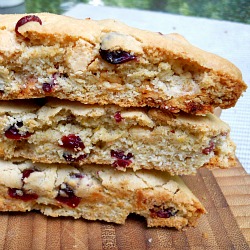
I made this Orange Cranberry White Chocolate Biscotti a few months ago and was extremely impressed. It’s definitely my favorite biscotti recipe that I’ve ever made. I shipped some of these to my grandmother but saved quite a few for myself. I baked them in the middle of the summer but I think the flavor combination would be perfect for the holidays.

One Year Ago: Feta Potato Salad

Orange Cranberry White Chocolate Biscotti
(Recipe source Annie’s Eats, originally from Bon Appetit, Dec. 1999)

Ingredients:

3 1/4 cups all-purpose flour
1 tablespoon baking powder
1/2 teaspoon salt
1 1/2 cups sugar
10 tablespoons unsalted butter, melted
3 large eggs
1 tbsp. vanilla extract
2 tablespoons orange zest
1 cup white chocolate chips
1 cup dried cranberries

Directions:

Preheat the oven to 350 degrees. Prepare a baking sheet with parchment paper (optional – I just used a nonstick baking sheet).

Whisk together flour, baking powder and salt in a medium mixing bowl and set aside. In the bowl of an electric mixer fitted with the paddle attachment or using a hand mixer, beat together sugar, melted butter, eggs, vanilla extract and orange zest on medium-high speed until well combined.  Reduce mixer speed to low and add in dry ingredients. Mix until just incorporated and then stir in white chocolate chips and dried cranberries with a spatula.

Divide the dough in half.  Working with one portion of dough, shape into a 12″ x 3″ rectangle on the prepared baking sheet. Repeat with the remaining dough so that the rectangles are parallel on the baking sheet. Bake until golden brown, 30 minutes. Remove from oven (leave oven on – you will need to bake the biscotti again) and let cool for 25 minutes.

Carefully transfer the rectangles to a work surface and remove the parchment paper from the pan. Using a serrated knife, carefully cut into half-inch slices on the diagonal. Place slices cut side up on the baking sheet. Return to oven and bake for another 12 minutes.  Transfer to a wire rack to cool completely. Store in an airtight container. Biscotti keeps for about seven days and freezes well.

Yield: about 3 dozen

Read Full Post »

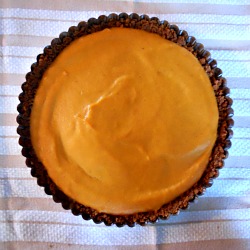
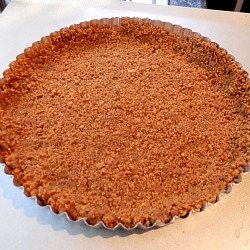
I wanted to bake a fall-inspired dessert the evening that I made homemade Chicken and Dumplings. I know I’ve mentioned this in several of my recent posts but I have just had a strong desire lately to spend time in my kitchen. I browsed through a fall dessert gallery on Food Network and this Pumpkin Tart with Gingersnap Crust caught my eye. First, one of my favorite fall desserts is this Pumpkin Cheesecake with Gingersnap Crust and second, I love any excuse to use my tart pan. I much prefer making tarts over pies.

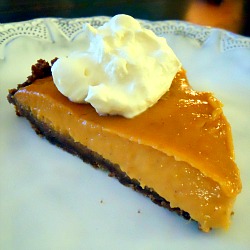
I was shocked to review the ingredient list and find that the tart only had six ingredients. Needless to say, it was extremely quick and easy to put together. I did add some of the traditional pumpkin pie spices to the filling – I just couldn’t stop myself but many of the recipe reviews said that it was perfect just the way the recipe was written. I served the tart with homemade bourbon whipped cream and both Brandon and I agreed that it was a winner!

The tart is very reminiscent of pumpkin pie and would be a nice addition to Thanksgiving or holiday dessert spreads.

One Year Ago: Apple Cinnamon Cake

Pumpkin Tart with Gingersnap Crust
(Recipe adapted from foodnetwork.com)

Ingredients:

2 1/2 cups gingersnaps, crushed (about 55-60 cookies)
6 tablespoons unsalted butter, melted
1 (15-ounce) can pumpkin puree (be sure you are not buying pumpkin pie filling)
3/4 cup sweetened condensed milk
2 egg yolks
1/2 teaspoon ground cinnamon
1/4 teaspoon ground nutmeg
1/8 teaspoon ground cloves
1/8 teaspoon salt

Directions:

Preheat oven to 350 degrees. Place a 9-inch tart pan with a removable bottom on a baking sheet.

Prepare crust by combining gingersnap crumbs and melted butter in a bowl and mix until crumbs are moistened. Place crumbs in tart pan and press evenly over the bottom and sides with your fingers or a measuring cup. Bake in preheated oven until set and lightly browned, about 10-12 minutes. Remove from oven and set aside to cool.

In a large bowl, whisk together pumpkin, condensed milk, egg yolks, spices and salt until well combined. Pour the filling into the cooled crust and return to oven. Bake until set and lightly browned, about 30 minutes. Remove tart from oven and allow to cool to room temperature. Chill in refrigerator at least one hour or until ready to serve.

To serve, remove tart from outer ring and slice. Serve with whipped cream, if desired. I made bourbon whipped cream by beating together 1/2 cup heavy cream, 1 tablespoon of bourbon and 2 tablespoons of sugar.

Yield: 8 servings

Read Full Post »

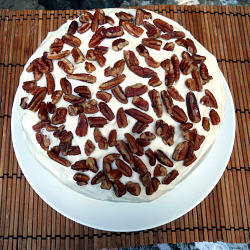
I’m pretty sure I have never had hummingbird cake anywhere other than my grandmother’s house. It is a very Southern, very simple cake. The cake only requires one bowl and no mixer and is very versatile. You can make a layer cake, a sheet cake, cupcakes or a bundt cake. Also, icing is optional! This cake becomes glorified banana bread without icing and could easily pass as a breakfast treat!

I have a constant supply of overripe bananas in my house. I usually freeze them for smoothies and oatmeal but recently I remembered my grandmother’s hummingbird cake and just had to make one. The perfect occasion arose when I was asked to bring a dessert to a family cookout.

No one had ever tried hummingbird cake before and it was a huge hit. Everyone asked for leftovers to take home. I even received the comment that every time I bring a cake to a family function it becomes the current favorite until the next cake I bring! Nice!

I opted to use the lightened version of this recipe and replaced a lot of the oil with applesauce. Usually, I don’t do this when baking cakes to take out but since this cake already features banana and pineapple, I thought the applesauce would be a nice healthier substitution. The sugar was cut back slightly in the recipe I followed but it could have been reduced even more.

Anyway you make this cake it is sure to be a hit. Next time you have overripe bananas and are looking for a change from traditional banana bread, this is your recipe!

One Year Ago: Easy Banana Muffins

Hummingbird Cake
(Recipe source Southern Living)

Ingredients:

FOR THE CAKE
Vegetable cooking spray
3 cups  plus 2 teaspoons all-purpose flour, divided
1 teaspoon baking soda
1/2 teaspoon salt
1 3/4 cups sugar
1 teaspoon ground cinnamon
2 large eggs
1/2 cup unsweetened applesauce
3 tablespoons vegetable oil
1 3/4 cups mashed banana (about 3 or 4)
1 1/2 teaspoons  vanilla extract
1 (8-ounce) can crushed pineapple, undrained

FOR THE FROSTING
1 (8-ounce) block cream cheese
1/2 cup butter (1 stick), softened
1 teaspoon vanilla extract
2-3 cups powdered sugar, sifted

Directions:

FOR THE CAKE
Preheat oven to 350 degrees. Coat three (8- or 9-inch) round cake pans with cooking spray; sprinkle 2 teaspoons flour evenly into pans and shake to coat.

Combine remaining 3 cups flour and next 4 ingredients in a large bowl. Mix together eggs, applesauce and oil. Add to the flour mixture and stir until dry ingredients are just moistened. (Do not beat. It will be lumpy.) Stir in mashed banana, vanilla extract, and pineapple. Pour batter evenly into prepared pans.

Bake at 350 degrees  for 23 to 25 minutes or until a wooden pick inserted in center comes out clean. Cool layers in pans on wire racks 10 minutes. Remove layers from pans and cool completely on wire racks.

FOR THE FROSTING
In the bowl of a stand mixer fitted with the whisk attachment or in a large bowl with a hand mixer, beat together butter and cream cheese until light and fluffy. Add vanilla and slowly add powdered sugar until you reach desired consistency and taste.

Read Full Post »

The peanut butter/chocolate combo and I go way back. I totally blame my dad for introducing me to Reese’s Cups at a young age. He later shared with me the magical creation that is a Dairy Queen Reese’s Blizzard (extra Reese’s, of course) and it all went downhill from there. If you were to look at my starred items in Google Reader you would see a downright embarrassing number of peanut butter and chocolate desserts. I just can’t help myself.

And let’s get real here. Yes, I am posting this recipe for Chocolate Peanut Butter Crispy Bars just three days after writing about abdominal exercises on my healthy living blog. So after you eat these bars, head on over to Peanut Butter Runner (so appropriately named) and try some new ab challenges. 😉

Just a reminder that I preach balance, balance, balance. Amen.

I was looking for a treat to bring to a beach weekend with friends. These bars seemed like something that would be easy for people to pick up when they were in the mood for something sweet. Everyone seemed to really enjoy them. I mean, how could you not!?

Despite having three layers, they were surprisingly easy to assemble. I loved that there was no baking involved and I did all of my chocolate melting in the microwave rather than on the stove top. The only downside was that they turned out not to be ideal for traveling in a hot car. They really needed to stay refrigerated and got a little melty on the trip down. Thankfully, they firmed back up in the fridge and no taste was compromised!

The crispy part of these bars is a little different. Instead of making your traditional Rice Krispies treat with marshmallows, you use corn syrup, water and sugar to make a sticky mixture to bind the Rice Krispies cereal together. I think that next time I will try the traditional method with marshmallows just for comparison. If I do, I will report back! (Don’t get me wrong, they are great as is!) And one last note, I doubled this recipe and made it in an 11 x 9 instead of an 8 x 8 pan.

I think these would be perfect to take to Fall football get-togethers. I promise they will disappear quickly and you will be the hit of the party for serving them!

One Year Ago: Sauteed Snapper with Cherry Tomatoes

Chocolate Peanut Butter Crispy Bars
(Recipe source Cate’s World Kitchen, originally from Baked: New Frontiers in Baking)

Ingredients:

FOR THE CRISPY CRUST
1 3/4 cups Rice Krispies cereal
1/4 cup water
1/4 cup sugar
3 tablespoons light corn syrup
3 tablespoons butter, melted

FOR THE PEANUT BUTTER LAYER
5 ounces milk chocolate, coarsely chopped
1 cup creamy peanut butter

FOR THE CHOCOLATE TOPPING
3 ounces dark chocolate, coarsely chopped
1/2 teaspoon light corn syrup
4 tablespoons unsalted butter

Directions:

FOR THE CRUST
Spray an 8″ square pan with nonstick spray and set aside. Place cereal in a large bowl and set aside.

Mix together the sugar, corn syrup and water in a medium saucepan and bring to a boil over medium high. Insert a candy thermometer into the mixture and boil until it reaches 235 degrees F. Remove from heat, stir in melted butter, pour over the cereal and mix together. Press into prepared pan and let cool while you make the peanut butter layer.

FOR THE PEANUT BUTTER LAYER
Melt the milk chocolate and peanut butter together in the top of a double boiler over gently simmering water. Stir until smooth, then pour over the crust and chill for an hour in fridge or until set. Alternatively, melt chocolate and peanut butter together in the microwave on 50 percent power. Cook in 30 second intervals, stirring between until melted and continue with directions above.

FOR THE CHOCOLATE TOPPING:
Clean out the double boiler and place dark chocolate, corn syrup and butter in pot. Stir until smooth, over medium low heat. Alternatively, use the same microwave method as above. Cool for about 30 seconds (stirring constantly), then pour over the peanut butter layer, gently spreading. Chill in the fridge for another hour, or until topping has hardened. Cut into squares and serve.

Read Full Post »

I love fig season but hate how short it is. I only had a few weeks this year to enjoy figs from my mother in law’s tree before they were ruined in a terrible storm (all of the fruit was bruised). I’m hoping we get a few more before the season is over but we’ll see. Fig season has been a big deal in my family for as long as I can remember. My dad used to pick buckets of them and make fig preserves every summer for my mom.

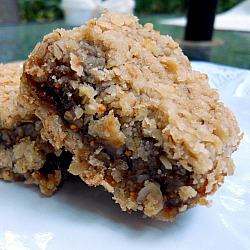
I came home from work one day last week and my mother in law had dropped off these Fresh Fig Bars. They were delicious. Kind of a cross between a Fig Newton and a traditional crumb bar. The fresh figs were truly the star of these bars.

I can’t wait to make these for my mom. I know she will love them. If you have access to fresh figs, these bars are a great way to use them!

One Year Ago: Fig Upside Down Cake (told ya I love fig season!)

Fresh Fig Bars
(Recipe adapted from Group Recipes)

Ingredients:

4 cups fresh figs
1 cup water
1 cup honey
3/4 teaspoon salt, divided
2 tablespoons grated lemon peel
2 tablespoons flour
2 tablespoons water
2 tablespoons lemon juice
1/2 cup walnuts, chopped
1 cup butter (or shortening)
3/4 cup brown sugar, packed
2 cups sifted flour
3 cups oats

Directions:

In a medium sauce pan, combine figs, water, honey, 1/4 teaspoon salt and lemon peel. Simmer about 1 1/2 hours, stirring occasionally.

Combine the 2 tablespoons of flour and water and stir into fig mixture. Let cook five minutes longer, stirring constantly. Remove from heat and stir in lemon juice and walnuts.

Preheat oven to 350 degrees. Prepare an 11 x 9 baking dish with cooking spray or butter.

In a stand mixer fitted with the paddle attachment or using a hand mixer, beat together butter and brown sugar until light and fluffy.

Combine flour, 1/2 teaspoon salt and oats and fold into butter mixture. Pat half of oatmeal mixture into bottom of pan and spread fig filling evenly over. Sprinkle remainder of oatmeal mixture over the filling and press lightly with a fork.

Bake for 30 minutes, or until golden brown. Let cool and then cut into squares and serve.

Yield: 16 squares

Read Full Post »

Older Posts »