Feeds:
Posts
Comments

Posts Tagged ‘baking’

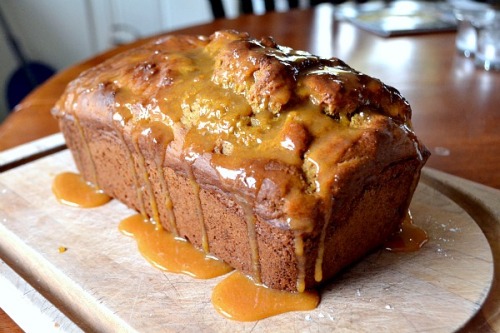
I really enjoy baking quick breads and muffins to freeze in individual servings for a quick breakfast or snack option. Last week I found myself with a past its prime banana and a little bit of leftover canned pumpkin puree so I thought I would combine the two to make banana pumpkin bread.

Since I typically end up eating this kind of thing for breakfast, I wanted to put a healthier spin on the bread. Since bananas provide so much natural sweetness I was able to reduce the amount of sugar that I used. I also subbed half of the flour for whole wheat and used plain Greek yogurt in place of some of the oil. Easy swaps that make a difference in the overall nutrition stats. I did still top it with a pumpkin glaze but it was worth it!

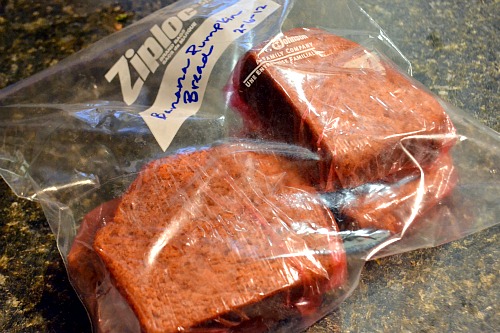
The bread was very easy to put together and didn’t even require the use of a mixer. I think I had it in the oven in under 15 minutes. Once it cooled I topped it with the glaze and then let the glaze set. I then sliced the bread into individual slices that I wrapped in saran wrap and placed in a gallon bag. I placed the bag in the freezer so I can grab a slice whenever I need a quick breakfast.

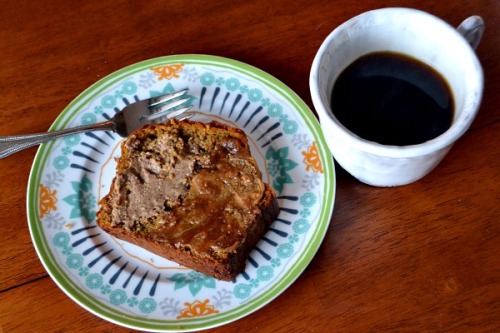
All it needs is a quick 30 seconds in the microwave. Sometimes I like to pop the slice into the toaster for a minute or so too for texture. It’s extra delicious topped with butter, jam or nut butter!

Healthier Banana Pumpkin Bread
(Recipe adapted from Nancy Creative)

Ingredients:

FOR THE BREAD
1 cup all-purpose flour
1 cup whole wheat flour
1 teaspoon baking powder
1 teaspoon baking soda
2 teaspoons pumpkin pie spice (or go up to a tablespoon if you really want it spiced)
1/2 teaspoon salt
1 very ripe medium banana, mashed with a fork
1/2 cup pumpkin puree
1/2 cup light brown sugar
1/2 cup plain nonfat Greek yogurt
2 eggs
1/4 cup canola oil
1 teaspoon vanilla

FOR THE GLAZE
1/2 cup powdered sugar, sifted
1 tablespoon milk
1 tablespoon pumpkin puree

Directions:  

Preheat oven to 350 degrees. Spray a 9 x 5 loaf pan with cooking spray and set aside.

In medium bowl, whisk together flour, baking powder, baking soda, pumpkin pie spice and salt.

In large bowl, mix together pumpkin, banana, yogurt, oil, eggs and brown sugar. Add in half of the flour mixture and mix well before adding in the other half. Continue to stir gently until everything is well combined.

Pour batter into prepared loaf pan and bake for 50-55 minutes, or until toothpick inserted in center comes out clean. Let the bread cool for about 10-15 minutes in the pan before removing it to cool completely on a wire wrack.

For the glaze, whisk together powdered sugar, milk and pumpkin and spoon over loaf once cool.

Yield: 8 servings

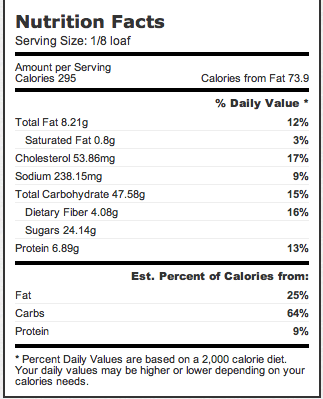
And here are the nutrition details…
Read Full Post »

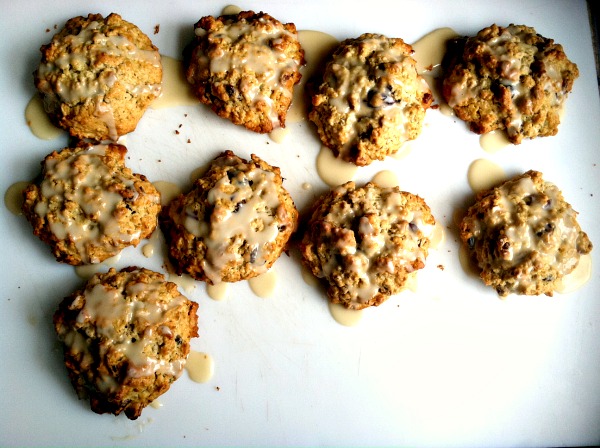
I have been on a baking kick lately. In the past couple of weeks I’ve baked these oatmeal maple scones twice, a hummingbird cake, peanut butter chocolate chip bars, pita bread and no-bake chocolate peanut butter oat cookies. The time in the kitchen has been relaxing and let’s face it…my sweet tooth is pretty out of control.

When I’m in the mood for something sweet and to bake my go-to is usually cookies or brownies. I wanted to branch out a bit so I flipped through a cookbook that was given to me as a gift a few months ago, Flour. It’s full of amazing recipes from Boston’s Flour Bakery and Cafe. I haven’t made scones in forever and had all the ingredients on hand for their oatmeal maple scones.

I expected the scones to be good but they were literally one of the best things that I have ever baked. So good that I had to make them again for my grandmother when I went to visit her the next week. I love anything that is oatmeal based and the texture of these scones is perfect. The edges are slightly crunchy but the centers are soft and the toasted pecans and golden raisins add a contrast. The scones are sweetened with maple syrup and include a maple glaze that is a great final touch.

The scones will keep at room temperature in an air tight container for a few days and they also freeze well. They might not seem too exciting but I promise you won’t regret making them for a breakfast (or anytime) treat!

Oatmeal Maple Scones
(Recipe source Flour)

Ingredients:

FOR THE SCONES
1 1/2 cups all-purpose flour
1 1/4 cup old-fashioned rolled oats (not quick)
1 1/2 teaspoons baking powder
1/4 teaspoon baking soda
1/4 teaspoon kosher salt
1/2 cup pecan halves, toasted and chopped
1/2 cup golden raisins or dried cranberries/cherries/etc
1/2 cup (1 stick) cold unsalted butter, cut into 10 pieces
1/3 cup heavy cream (or half and half)
1/2 cup maple syrup
1 teaspoon vanilla
1 cold egg

FOR THE GLAZE
1 cup powdered sugar, sifted
3 tablespoons maple syrup
1-2 tablespoons water

Directions: 

 Preheat oven to 350 degrees.

Using a stand mixer with the paddle attachment (or a hand mixer), combine flour, oats, baking powder, baking soda, salt, pecans and raisins on low speed until combined well. Add butter pieces and beat on low speed for about 30 seconds or until butter is broken down but with pebble sized pieces still visible.

In a separate small bowl, whisk cream, maple syrup, vanilla and egg together. With mixer still on low speed, add wet ingredients to dry mixture and beat for about 30 seconds until just combined.

Remove bowl from mixer and scrape down sides to make sure that all dry ingredients have been incorporated. Using a 1/4 or 1/3 cup measuring cup, drop rounded scoops of dough onto a baking sheet 2 to 3 inches apart. You should have 9 scones.

Bake for 30-40 minutes, or until tops are golden brown. Start checking at the 30 minute mark. Transfer to a wire rack to cool for about half and hour.

Make the glaze while the scones are cooling. Whisk together sifted powdered sugar, maple syrup and water. Once the scones have cooled, brush tops with glaze.

If you keep the scones for more than one day or freeze them, they can be “refreshed” by heating in a 300 degree oven for about 5 minutes.

Yield: 9 scones

Read Full Post »

Last week Charlotte was hit with a heavy dose of winter weather. In the South, this brings your daily routine to a screeching halt. I found myself unable to navigate my way anywhere but into the kitchen. Given the fact that I tend to keep myself insanely busy and overcommited, I have to admit that it was nice to be forced to slow down.

Instead of working late and hitting the gym, I baked cookies and made a big batch of chili. I tend to always make the same cookies – chocolate chip, oatmeal chocolate chip or oatmeal raisin. I wanted to make something new that I hadn’t baked or blogged about before. I browsed through my favorite go-to cookbook, The Gourmet Cookbook, and decided to try the Oatmeal Trail Mix Cookies. Brandon was not on board with the raisins that the recipe called for, I wasn’t on board with the shortening and I didn’t have peanuts so I made a few substitutions to the original recipe.

Despite the substitutions, these cookies turned out great. One thing I was surprised to discover is that these needed to bake a little longer. I usually under bake cookies but that was not the case with this recipe. I under baked my first batch and the texture just wasn’t right. I baked the second batch a little longer and they were right on. Also, I liked these better cool than hot out of the oven. Usually we love warm cookies, and these were plenty good warm, but even more outstanding once they’d cooled.

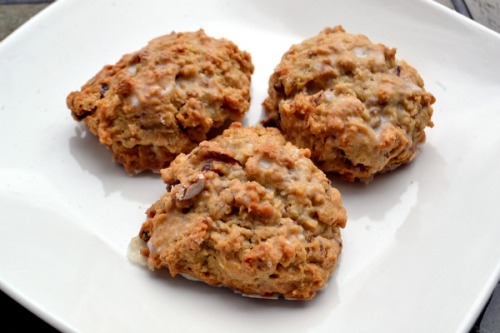
These Oatmeal Coconut Chocolate Chip Cookies are the perfect way to put a different twist on the traditional chocolate chip or oatmeal cookie recipe.

One Year Ago: Overnight Baked French Toast
Two Years Ago: Penne a la Betsy

Oatmeal Coconut Chocolate Chip Cookies
(Recipe adapted from Gourmet)

Ingredients:

1 stick (1/2 cup) unsalted butter, softened
1/2 cup firmly packed light brown sugar
1/4 cup granulated sugar
1 large egg
1/2 teaspoon baking soda dissolved in 1 tablespoon warm water
1/2 cup plus 2 tablespoons all-purpose flour
1/2 teaspoon salt
1/2 teaspoon vanilla extract
1 1/2 cups old-fashioned rolled oats
1/2 cup sweetened flaked coconut
6-ounces semisweet chocolate chips
1/3 cup pecans, chopped

Directions:

Preheat oven to 375 degrees.

In the bowl of a stand mixer fitted with the paddle attachment or in a large bowl using an electric mixer, cream the butter and sugars together on medium high speed. Beat in the egg, baking soda mixture, flour, salt and vanilla. Reduce speed to low and mix in oats, coconut, chocolate chips and pecans.

Drop rounded tablespoons of the dough onto greased baking sheets about 4 inches apart and with a fork flatten and spread each mound into a round, about 3 inches in diameter.

Bake the cookies in batches in the middle oven for 8 to 10 minutes, or until they are golden. Transfer to racks and let cool.

Yield: about 30 cookies

Read Full Post »

I attended my first holiday cookie exchange last week and the stakes were high considering our group was made up of Charlotte-area food and healthy living bloggers. I knew that I was going to bring my tried and true Orange Cranberry White Chocolate Biscotti but I also wanted to bring something a little more Christmas-esque. After a bit of research, I decided that these Chocolate Peppermint Bark Cookies would be perfect.

These cookies feature melted high-quality chocolate topped with crushed peppermints and a drizzle of white chocolate over a shortbread base. Although these cookies require multiple steps, they were fairly simple. I struggled most with the shortbread cookie dough. It stuck to my fingers as I tried to press it into the pan. The key to avoiding this was keeping my fingers wet with water. I was concerned that the shortbread wouldn’t cook properly but it turned out just right.

The cookies were a big hit at the party and the presentation was beautiful for the holidays. This recipe will definitely be a repeat for many holiday seasons to come. I thinke these cookies would be perfect in holiday gift bags too!

One Year Ago: Chili Lime Tilapia
Two Years Ago: Open-Faced Steak Sandwiches with Horseradish Sauce

Chocolate Peppermint Bark Cookies
(Recipe source Bon Appetit)

Ingredients:

Nonstick vegetable oil spray
2 cups all-purpose flour
1/4 teaspoon salt
1 cup (2 sticks) unsalted butter, room temperature
1 cup sugar
1 teaspoon vanilla extract
1 large egg yolk
6 ounces high-quality bittersweet or semisweet chocolate, chopped
1/2 cup (about 3 ounces) finely chopped red-and-white striped hard peppermint candies or candy canes
2 ounces high-quality white chocolate (such as Lindt or Perugina)

Directions:

Preheat oven to 350 degrees. Spray a 13 x 9 inch baking pan with nonstick spray. Line bottom of pan with a long strip of 9-inch-wide parchment paper, leaving an overhang on both short sides of pan.
Whisk flour and salt in medium bowl. Using a hand-held electric mixer or stand mixer fitted with the paddle attachment, beat butter in large bowl until creamy, about 2 minutes. Gradually beat in sugar and continue beating until mixture is light and fluffy, stopping occasionally to scrape down sides of bowl, about 3 minutes. Beat in vanilla, then egg yolk. Gradually add flour mixture, beating on low speed just to blend.

Drop dough by tablespoonfuls into prepared baking pan, spacing evenly. Using moistened fingertips, press dough to form even layer over bottom of pan. Pierce dough all over with fork.

Bake cookie base until light golden brown, slightly puffed and edges begin to come away from sides of pan, about 30 minutes. Place pan on wire rack and immediately sprinkle bittersweet chocolate over. Let stand until chocolate softens, about 3 minutes. Using a small offset spatula, spread chocolate over top of cookie in a thin even layer. Immediately sprinkle chopped peppermint candies over.

Stir white chocolate in a medium metal bowl set over saucepan of simmering water until melted and smooth. Remove from water and use a fork to drizzle the white chocolate all over cookies. Chill until white chocolate is set, about 30 minutes.

Grab the paper overhang and lift from pan. Transfer to work surface and using a large knife, cut cookie into irregular pieces.

Yield: about 36 pieces

Read Full Post »

I thought these cupcakes would be the perfect thing to share in celebration of my second blogiversary! Since I launched Bakin’ and Eggs two years ago I have posted over 200 recipes, including 68 from Gourmet Magazine. I love that my blog allows me to share recipes with friends, family and readers from all over and also that Brandon and I now have a great resource of all our favorite recipes.

While we’re on the topic of my second blogiversary, I want to use this opportunity to discuss the future of this blog. Many of you know that I launched a healthy living blog back in April. Since then I have been asked many times if I am going to combine the blogs. As of right now, I have no plans to do that. I like that Bakin’ and Eggs is dedicated to recipes and that I have the freedom to publish anything I want without feeling that it has to fit in the “healthy living” bubble. And while my version of healthy living includes all things in moderation, I know that it wouldn’t work for everyone to see things like cupcakes and macaroni and cheese on Peanut Butter Runner.

Enough serious talk…let’s get to the cupcakes. 😉

I made these a few weeks ago for my niece’s first birthday. I will admit that I much prefer baking cakes and cupcakes to decorating them but when there’s a special occasion I can’t resist. Luckily, Brandon is very creative and helps tons when I take on these baking projects.

The simplicity and cuteness of the piglets and frogs seemed like a great fit for a first birthday party and the pink and green color scheme gave them a fun and girly touch. I used vanilla cake for the piglets and dark chocolate for the frogs to offer a flavor choice. I iced them both with buttercream that I colored with food coloring.

They were a hit with everyone at the party…including the birthday girl!

One Year Ago: Flourless Chocolate Cake (my first blogiversary!)
Two Years Ago: Dad’s Chili (my very first recipe!)

Piglet Cupcakes
(Inspiration from Parenting)

Ingredients:

Cupcakes (your choice of flavor)
Vanilla buttercream
Red food coloring
Black decorating icing (you can buy this in a tube)
Large pink marshmallows
Chocolate chips
Pink decorating sugar

Directions:

Using a handheld mixer or a stand mixer, color the icing pink with red food coloring. Frost cupcakes.

Snip a ¼-inch thick slice from a marshmallow, crosswise. Dip cut side of thin marshmallow slice into pink sugar to coat. Cut sugared slice in half crosswise and form into two ear-shaped triangles. Save larger piece of marshmallow for the snout.  Repeat with remaining marshmallows.

Press the larger piece of the marshmallow, cut side down, onto the lower half of the cupcake for the pig’s snout. Press two sugared marshmallow ears into opposite edge of cupcake, as pictured. Press the chocolate chips in for the piggy’s eyes, pointed end down (or use the black decorating icing). Pipe a mouth onto the cupcake with the black decorating icing.

Frog Cupcakes
(Inspiration from Cutest Food)

Ingredients:

Cupcakes (your choice of flavor)
Vanilla buttercream
Large white marshmallows
Chocolate chips
Red decorating icing

Directions:

Using a handheld mixer or a stand mixer, color the icing green with green food coloring. Frost cupcakes.

Cut marshmallows into thin slices to form the eyes. Press chocolate chips into eyes (we randomly placed ours so they were not all the same) and press into frosting. Draw smile and tongue (if desired) with red decorating icing.

Read Full Post »

First, my apologies for my recent lack of posts. I was busy running the Marine Corps Marathon! Check out my race recap on my healthy living blog. Now that marathon training is over, you can expect more regular posts. I am looking forward to spending lots of time in the kitchen this winter.

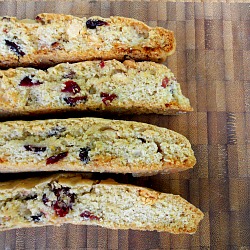
Now, on to tasty treats! I don’t bake biscotti often but when I do it’s because I’m sending a package with baked goods. Biscotti holds up extremely well when shipped so I usually include it in my Operation Baking Gals packages and when I send treats to my grandmother. Biscotti is one of her favorites.

Biscotti can seem a little intimidating or time consuming because there are multiple steps and you have to bake it twice but it really is a simple process. If you’ve resisted trying to make biscotti at home, give it a try!

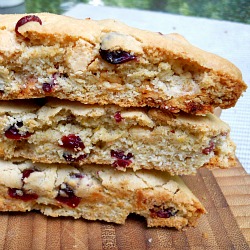
I made this Orange Cranberry White Chocolate Biscotti a few months ago and was extremely impressed. It’s definitely my favorite biscotti recipe that I’ve ever made. I shipped some of these to my grandmother but saved quite a few for myself. I baked them in the middle of the summer but I think the flavor combination would be perfect for the holidays.

One Year Ago: Feta Potato Salad

Orange Cranberry White Chocolate Biscotti
(Recipe source Annie’s Eats, originally from Bon Appetit, Dec. 1999)

Ingredients:

3 1/4 cups all-purpose flour
1 tablespoon baking powder
1/2 teaspoon salt
1 1/2 cups sugar
10 tablespoons unsalted butter, melted
3 large eggs
1 tbsp. vanilla extract
2 tablespoons orange zest
1 cup white chocolate chips
1 cup dried cranberries

Directions:

Preheat the oven to 350 degrees. Prepare a baking sheet with parchment paper (optional – I just used a nonstick baking sheet).

Whisk together flour, baking powder and salt in a medium mixing bowl and set aside. In the bowl of an electric mixer fitted with the paddle attachment or using a hand mixer, beat together sugar, melted butter, eggs, vanilla extract and orange zest on medium-high speed until well combined.  Reduce mixer speed to low and add in dry ingredients. Mix until just incorporated and then stir in white chocolate chips and dried cranberries with a spatula.

Divide the dough in half.  Working with one portion of dough, shape into a 12″ x 3″ rectangle on the prepared baking sheet. Repeat with the remaining dough so that the rectangles are parallel on the baking sheet. Bake until golden brown, 30 minutes. Remove from oven (leave oven on – you will need to bake the biscotti again) and let cool for 25 minutes.

Carefully transfer the rectangles to a work surface and remove the parchment paper from the pan. Using a serrated knife, carefully cut into half-inch slices on the diagonal. Place slices cut side up on the baking sheet. Return to oven and bake for another 12 minutes.  Transfer to a wire rack to cool completely. Store in an airtight container. Biscotti keeps for about seven days and freezes well.

Yield: about 3 dozen

Read Full Post »

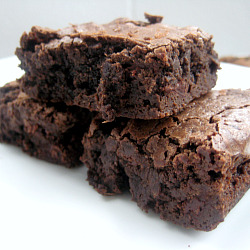
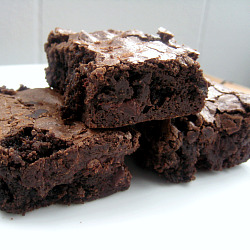
Let’s get straight to the point. These are without a doubt the best homemade brownies I’ve ever had. Ever. They are chocolaty, fudgy, rich and indulgent. The best part about these brownies is that I didn’t have to make them! We visited my parents in Atlanta several months ago and my dad had these ready for us when we arrived. We actually had dinner reservations that night at Top Chef contestant Kevin’s restaurant, Woodfire Grill, but I couldn’t resist sampling them. Totally worth slightly spoiling my appetite over! 🙂

Over the course of the visit I ate my fair share of these brownies. We took the leftovers home with us and made them even more ridiculously indulgent by serving them sundae style with ice cream and chocolate syrup. There was no brownie left behind.

All brownie lovers must try this recipe – even if you usually rely on boxed mixes. They are truly outstanding and will put any boxed brownie mix to shame. I will admit that I used to use boxed brownie mixes until I realized several years ago how easy homemade brownies are and produce far tastier results. They are so worth the little bit of extra effort required!

Chewy, Fudgy Triple Chocolate Brownies
(Recipe source Cooks Illustrated, May 2000)

Ingredients :

5 ounces semisweet or bittersweet chocolate, chopped
2 ounces unsweetened chocolate , chopped
8 tablespoons (1 stick) unsalted butter, cut into quarters
3 tablespoons cocoa powder (either Dutch-processed or natural cocoa works well in this recipe)
3 large eggs
1 1/4 cups granulated sugar
2 teaspoons vanilla extract
1/2 teaspoon salt
1 cup unbleached all-purpose flour

Directions:

Adjust oven rack to lower-middle position and preheat oven to 350 degrees. Spray an 8-inch square baking pan with nonstick cooking spray. Fold two 12-inch pieces of foil lengthwise so that they measure 7 inches wide. Fit one sheet in bottom of greased pan, pushing it into corners and up sides of pan. Fit the second sheet in pan in same manner, perpendicular to first sheet. Spray foil with nonstick cooking spray. The foil overhangs will help you lift the brownies out of the pan.

Place a medium heatproof bowl over a pan of almost-simmering water. Melt chocolates and butter, stirring occasionally until mixture is smooth. Whisk in cocoa until smooth. Set aside to cool slightly. Alternatively, you can melt chocolates and butter in a microwave safe bowl. Cook on 50 percent power, stopping to stir ever 30 seconds, until mixture is smooth.

In a separate medium bowl, whisk together eggs, sugar, vanilla and salt until combined, about 15 seconds. Whisk warm chocolate mixture into egg mixture; then stir in flour with wooden spoon until just combined. Pour mixture into prepared pan, spread into corners and level surface with rubber spatula. Bake until slightly puffed and toothpick inserted in center comes out with a small amount of sticky crumbs clinging to it, 35 to 40 minutes.

Completely cool brownies on a wire rack to room temperature, about 2 hours. (This is a very crucial step – I know it’s hard but you have to let them completely cool!) Remove brownies from pan using foil handles. Cut into 1-inch squares and serve. (Do not cut brownies until ready to serve; brownies can be wrapped in plastic and refrigerated up to 5 days.)

Read Full Post »

68 Days of Gourmet: Day 20

The beautiful thing about 68 Days of Gourmet is that my options are wide open. When a food magazine is in publication for 68 years you can be sure that they probably have a recipe for most anything you’re craving.

We picked up a Christmas tree on Sunday. We planned on decorating it Monday and I thought I’d bake some cookies to be festive and go with our eggnog (and because I love any excuse to bake cookies). One of our favorite cookie combinations is Oatmeal Chocolate Chip. I’ve tried several different recipes in the past and decided to try Gourmet’s recipe since I’m in the middle of 68 Days of Gourmet.

This recipe was super simple. The dough was made and ready to go in the oven in less than 10 minutes. The cookies smelled great cooking and were the perfect treat for holiday decorating! These are great and we’ve enjoyed having them around the house this week.

Chocolate Chip Oatmeal Cookies
(Recipe source Gourmet, March 1994)
Printable Recipe: Chocolate Chip Oatmeal Cookies

Ingredients:

2 cups all-purpose flour
1 teaspoon baking soda
1/2 teaspoon baking powder
1 teaspoon salt
1 cup old-fashioned rolled oats
2 sticks (1 cup) unsalted butter, softened
1 1/4 cups firmly packed light brown sugar
1/4 cup granulated sugar
2 large eggs
1 teaspoon vanilla
2 cups (12 ounces) semisweet chocolate chips

Directions:

Preheat oven to 350 degrees.

Whisk together flour, baking soda, baking powder, salt and oats in a medium bowl. In the bowl of a stand mixer fitted with the paddle attachment (or in a large bowl using a hand-held mixer) cream butter and sugar on medium-high speed until fluffy and lightened in color, about 3 minutes. Add eggs, 1 at a time, beating well after each addition. Add vanilla and then slowly beat in flour mixture. Stir in chocolate chips after flour has been incorporated.

Drop dough in rounded tablespoons onto baking sheet, leaving about 2 inches between cookies. Bake for 12-15 minutes (I only baked mind for 9 minutes because we prefer soft and not crisp cookies), or until golden. Cool completely on wire racks.

Store in an airtight container for up to 5 days.

Yield: 5-6 dozen (Recipe can easily be cut in half)

Read Full Post »

rockyroadbrownies

I can’t think of a better way to kick-off 68 Days of Gourmet than with these Rocky Road Brownies. Last week I was really craving a sweet treat for dessert and more specifically, something that would taste great topped with ice cream. I thought brownies would meet my requirements perfectly. I was going to make a basic fudge brownie recipe but then I spotted these Rocky Road Brownies and abandoned my plans for simplicity.

The base layer really is similar to your basic fudge brownie but the topping is what really packs a punch. I personally love marshmallows so these were fabulous to me. Very chocolately and indulgent – especially topped with a scoop of ice cream!

rockyroadbrownie250(2)

Rocky Road Brownies
(Recipe source Gourmet, December 1996)

Ingredients:

3/4 stick (6 tablespoons) unsalted butter, cut into pieces
2 ounces unsweetened chocolate, chopped
4 ounces fine-quality bittersweet chocolate (not unsweetened), chopped and divided
1 cup sugar
2 large eggs
3/4 cup all-purpose flour
1/2 teaspoon salt
1 cup walnuts, coarsely chopped
1 cup miniature marshmallows

Directions:

Preheat oven to 350 degrees. Grease and flour a 9-inch square baking pan.

In a heavy 1 1/2-quart saucepan over low heat, melt butter, unsweetened chocolate and 2 ounces of bittersweet chocolate. Stir constantly until smooth. Remove pan from heat and cool mixture for about 10 minutes. Stir in sugar and then add eggs 1 at a time, beating well with a wooden spoon after each addition. The mixture should look glossy and smooth. Add in flour and salt and stir until just combined.

Reserve 1/2 cup of the batter in a separate bowl. Spread remaining batter evenly in pan and bake on middle rack of oven for 20 minutes.

While bottom layer is baking, stir walnuts, marshmallows and remaining 2 ounces of bittersweet chocolate into reserved batter. Remove pan from oven and spoon walnut-marshmallow mixture evenly over partially baked layer. Bake for an additional 7-10 minutes, or until marshmallows are golden. Cool completely in pan on a rack before cutting.

Layer brownies between sheets of wax paper in Tupperware and store at room temperature. They will stay fresh for several days.

Yield: 16 brownies

rockyroadbrownies250

Read Full Post »

choccakeandslice

I had a three week break between my temporary job with the American Cancer Society and my new full-time job that I started Monday. I’m not going to lie…I must admit that I enjoyed my brief stint as a housewife. The best perks were having plenty of time to work out (daily run and yoga classes!) and having time to cook and bake to my heart’s content!

Last week I was really craving a chocolate cake. I had a block of cream cheese in the fridge and so I decided a chocolate cake with chocolate cream cheese frosting would be perfect. I used my all-time favorite chocolate cake recipe, the Hershey’s “Perfectly Chocolate” Chocolate Cake, and a based the frosting off of a recipe that I found on The Cupcake Project.

It was a delicious combination. The Hershey’s cake is so moist and the chocolate cream cheese was to die for. It was kind of reminiscent of chocolate cheesecake for me. Brandon and I both enjoyed this cake for dessert multiple nights last week and also shared a few slices with family. I will most definitely be using this flavor combination again!

choccake

Chocolate Cake with Chocolate Cream Cheese Frosting
(Recipe sources Hershey’s and The Cupcake Project)

Ingredients:

FOR THE CAKE
2 cups sugar
1 3/4 cups all-purpose flour
3/4 cup Hershey’s Cocoa powder
1 1/2 teaspoons baking powder
1 1/2 teaspoons baking soda
1 teaspoon salt
2 eggs
1 cup milk
1/2 cup vegetable oil
2 teaspoons vanilla extract
1 cup boiling water

FOR THE FROSTING
1 (8 ounce) package cream cheese at room temperature
1/4 cup butter (1/2 stick) at room temperature
3 cups sifted powdered sugar
1/3 cup cocoa powder

Directions:

FOR THE CAKE
Preheat oven to 350 degrees. Grease and flour two 8-inch or 9-inch round baking pans.

In the bowl of a stand mixer stir together sugar, flour, cocoa powder, baking powder, baking soda and salt. Add eggs, milk, oil and vanilla and beat on medium speed for about two minutes. Pour in boiling water and continue to mix until incorporated, batter will be thin. Evenly distribute batter between the two prepared pans.

Bake 30 to 35 minutes or until wooden pick inserted in center comes out clean. Start checking the cakes around 25 minutes as oven temperatures may vary (and no one likes an overdone cake)!

Cool in pans for about 10 minutes then run a knife around the edges and gently remove from pans and place on wire racks to cool completely.

FOR THE FROSTING
In the bowl of a stand mixer, beat all ingredients on medium high speed until light and fluffy.

To frost cake, place first layer down and frost top, leaving about a 1/2 inch border. Place second layer on top and frost top and then sides.

Yield: 8-12 servings

choccakeslice

Read Full Post »

Older Posts »