Feeds:
Posts
Comments

Archive for the ‘68 days of Gourmet’ Category

I hope this post finds everyone enjoying the holidays and excited for the arrival of 2011! It’s been a great year on Bakin’ and Eggs and I wanted to share the most popular posts of 2010 with you.

10. Warm Chocolate Raspberry Pudding Cake – this warm, gooey, delicious cake was the second to last recipe that I posted for my 68 Days of Gourmet project. It was a great way to end things with a bang!

9. Maple Butter Pecan Ice Cream – another addition from 68 Days of Gourmet, this Maple Butter Pecan Ice Cream was the first recipe I tried with my KitchenAid Ice Cream Maker attachment.

8. Chocolate Cream Pieare you noticing a theme  here? This is another recipe from 68 Days of Gourmet and another dessert. You guys definitely love your sweets (like me!).

7. Applesauce Spice MuffinsMuffins are always a hit on the blog, especially when I add a healthy twist. These applesauce spice muffins are a breeze to whip up for breakfast and full of warm flavors!

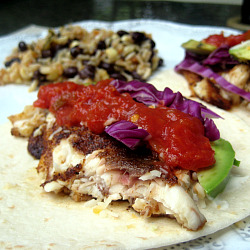
6. Fish Tacos with Baja CreamThis is our go-to fish taco recipe. They are easy, healthy and delicious!

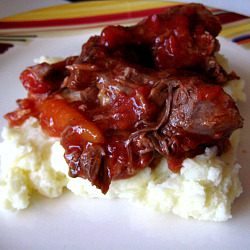
5. 3 Ingredient Pot Roast – Another winner from 68 Days of Gourmet, this pot roast contains only three ingredients and is sure to be a winner with the whole family. Try using the leftovers for shredded beef enchiladas!

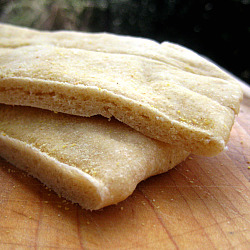
4. Pita Bread It’s easy to make pita bread at home! This pita bread freezes wonderfully and tastes much better than store bought.
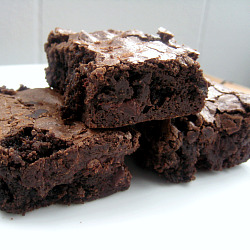
3. Chewy, Fudgy Triple Chocolate Brownies – My dad made these amazing brownies from Cooks Illustrated and they are absolutely perfect. A must-try for chocolate lovers. Even better served warm and topped with ice cream!

2. Roasted Spiced Sweet Potatoes an easy, flavorful side dish and a delicious spin on sweet potatoes.

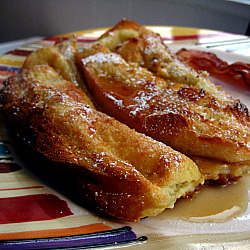
1. Overnight Baked French Toast – it’s only fitting that a recipe from 68 Days of Gourmet is the top post of 2010. I can’t blame you though, this French toast recipe is wonderful and so easy to assemble the night before. If you are an overnight guest in my house, it’s a pretty sure thing that you will be eating this French toast the next morning!

Thank you all for reading and eating along with me! Here’s to much more deliciousness (and more frequent posting, I promise) in 2011!

Read Full Post »

68 Days of Gourmet: DAY 68!!!!!!!!

What better way to end 68 Days of Gourmet than with a champagne cocktail? Cheers to the project and cheers that it’s over! I can honestly say that I’m still glad that I decided to make the 68 recipes even though it ended up taking a little longer to get through them than anticipated.

There were definite hits and misses but overall I was impressed by the variety and quality of recipes to choose from. There are many recipes from the project that I know I will be making for years to come. Also, The Gourmet Cookbook is a wonderful resource to have in your kitchen and I highly recommend that everyone buy a copy of this book. I know that I will continue to turn to it for inspiration.

I created a 68 Days of Gourmet recipe index page that can be found at the top of the page. Our favorites are marked on the recipe index page but I’d like to share some of our very favorite recipes with you in this post.

Macaroni and Cheese
Chili Lime Tilapia
Three Ingredient Pot Roast

Bourbon Pumpkin Cheesecake
Island Pork Tenderloin
Chocolate Cream Pie
Thai Beef Noodle Soup
Spiced Chicken
Overnight Baked French Toast
Black Bean and Quinoa Salad

I will definitely be making all of these recipes over and over again.

If you have never had a French 75 you must try one. It’s a combination of gin, lemon juice, sugar and champagne. Don’t be leary of the drink if you’re not a gin lover – it does not have a strong gin taste. It’s actually a very refreshing flavor combination that packs quite a punch. 😉

If you’ve been following along the 68 Days of Gourmet – thank you! I’d love to hear your thoughts on the project and if you have any favorite recipes.

One year ago: Beef Bolognese, Grilled Chicken Drumsticks

And here’s the VERY LAST recipe of 68 Days of Gourmet!!!

French 75
(Recipe source Gourmet, September 1997)

Ingredients:

3 ounces gin
3 ounces fresh lemon juice
4 teaspoons superfine granulated sugar
1 1/2 cups ice cubes
1 cup chilled champagne

Directions:

In a cocktail shaker, combine gin, lemon juice, sugar and ice cubes and shake to chill. Strain cocktails into two wine glasses, champagne flutes or on ice in cocktail glasses and top off with champagne.

Yield: 2 servings

Read Full Post »

68 Days of Gourmet: Day 67

Apologies for my disappearance the last week but I’m back with the final two recipes to wrap up 68 Days of Gourmet. And promises of lots more deliciousness to follow after the project is complete. I also want to point out the newly created 68 Days of Gourmet page (found above) that categorizes all of the recipes from the project.

Now that the housekeeping details are out of the way, let’s talk about the Warm Chocolate Raspberry Pudding Cake. I saw this cake while browsing The Gourmet Cookbook and loved that it was elegant but relatively easy. This is the type of cake that would be perfect for a dinner party or date night dinner. Another plus is that it can be made ahead of time and reheated.

The frosting is poured into the bottom of the cake pan and the batter is poured on top. When you invert the cake from the pan your frosting is all melted and gooey on top of the cake. This cake is very moist and the raspberry jam in the frosting and cake adds a nice flavor dimension. The only change I would make next time I bake this is using a higher quality jam to really step up the raspberry flavor.

This is an impressive cake that requires minimal effort and is sure to be a crowd pleaser – especially with the chocolate lovers!

One year ago: Crash Hot Potatoes, Chocolate Biscotti

Warm Chocolate Raspberry Pudding Cake
(Recipe source Gourmet, January 1999)

Ingredients:

FOR THE FROSTING
3 ounces fine-quality bittersweet chocolate (not unsweetened), roughly chopped
1/2 cup seedless raspberry jam (about 5 ounces)
1/2 cup heavy cream

FOR THE CAKE BATTER
1/2 cup boiling water
1/3 cup plus 2 teaspoons unsweetened cocoa powder (not Dutch process)
1/4 cup whole milk
1/2 teaspoon vanilla
1/3 cup seedless raspberry jam (about 3 ounces)
1 stick (1/2 cup) unsalted butter, softened
1/3 cup packed light brown sugar
1/3 cup granulated sugar
2 large eggs
1 cup all-purpose flour
3/4 teaspoon baking soda
1/4 teaspoon salt

Preheat oven to 350 degrees and generously butter a 9- by 2-inch round cake pan.

FOR THE FROSTING
In a small heavy saucepan over low heat bring jam, cream and chocolate to a simmer, stirring occasionally, until smooth. Pour frosting into cake pan.

FOR THE CAKE BATTER
In a bowl whisk together boiling water and cocoa powder until smooth and whisk in milk, vanilla, and jam. In a large bowl with an electric mixer beat together butter and sugars until light and fluffy. Add eggs one at a time,  beating well after each addition. In another bowl, sift together flour, baking soda and salt and add to egg mixture in batches alternately with cocoa mixture, beginning and ending with flour mixture and beating well after each addition.

Pour batter evenly over frosting mixture and bake in middle of oven 30 to 35 minutes, or until a toothpick inserted into cake comes out clean (frosting on bottom will still be liquid). Cool cake slightly in pan on a rack, 10 to 20 minutes.

Run a thin knife around edge of pan and twist pan gently back and forth on a flat surface to loosen cake. Invert a cake plate with a slight lip over cake pan and, holding pan and plate together with both hands, invert cake onto plate. Frosting will cover cake and run onto plate.

* Cake may be made 1 day ahead, cooled completely in pan and left in pan, covered, at room temperature. Reheat cake, uncovered, at 350 degrees for 10 to 15 minutes.

Yield: 6-8 servings

Read Full Post »

68 Days of Gourmet: Day 66

North Carolina strawberries just came into season and Brandon sweetly picked up a flat for me at the farmer’s market last week. Strawberry is my favorite flavor of ice cream and ever since I received the KitchenAid ice cream maker attachment last Christmas, I’ve enjoyed trying homemade ice cream recipes. I was thrilled to see that Gourmet had several no-cook strawberry ice cream recipes.

We had friends in town visiting last weekend and I thought this Strawberry Cheesecake Ice Cream would be the perfect dessert for our cookout Friday night. It was so easy to put together since it didn’t require any cooking. You just throw all the ingredients in a blender then into the ice cream maker to freeze. I made it on my lunch break the day I served it. Not surprisingly, the ice cream was a hit. Who doesn’t love homemade ice cream?

One year ago: Baked Eggplant Parmesan, Mississippi Mud Pie

No Cook Strawberry Cheesecake Ice Cream
(Recipe source Gourmet, July 2000)

Ingredients:

3/4 pound (1 quart) strawberries, chopped
8 ounces softened cream cheese
3/4 cup sugar
1 cup milk
1 tablespoon fresh lemon juice
Pinch of salt
1/2 cup heavy cream

Directions:

Place strawberries, cream cheese, sugar, milk, lemon juice and salt in a blender. Blend until just incorporated. Stir in the heavy cream and chill. Follow the directions on your ice cream maker to freeze ice cream.

For the KitchenAid I slowly added the chilled ice cream base and mixed on the lowest speed for about 15 minutes, until the ice cream was the consistency of soft serve. Place in an airtight container and put in freezer to freeze completely.

Note, you may want to take the ice cream out to soften 10-15 minutes before serving.

Yield: about 8 servings

And I can’t resist sharing this picture that shows you how good the ice cream base tasted but I won’t reveal how much unfrozen ice cream I ate!

Read Full Post »

68 Days of Gourmet: Day 65

I haven’t had much luck with making pasta salad in the past. It always seemed to be lacking in flavor and pretty mediocre. We decided to grill kebabs last week and enjoy our first dinner out on our patio. I thought pasta salad sounded like the perfect side item.

I read through several recipes from Gourmet on Epicurious and this recipe for Whole-Wheat Pasta Salad with Zucchini and Olives sounded like a winner. We love Mediterranean flavors and I didn’t see how this could be boring with zucchini, olives, onions, tomatoes, garlic, fresh basil and feta.

I made a few modifications to the recipe. First, I made the pasta salad ahead of time (wanted to go to a late yoga class!) so I skipped grilling the zucchini in favor of a quick saute. Second, I just do not love the flavor of raw onions and garlic so I gave those a quick saute too (and subbed Vidalia’s for red onions because they were on hand).

The verdict? Awesome! The only complaint Brandon had was with the whole wheat pasta but that’s typical. He’s not a lover of the added chewiness. If you struggle with that too you may want to substitute white pasta for the wheat but keep in mind the added health benefits of using whole wheat pasta 🙂

I loved the flavors of this pasta salad and enjoyed the leftovers for lunch the next couple days. I cut the recipe in half and it still made a ton. This would be great for entertaining or to make for lunches for the week. I will most definitely be making this recipe again soon.

One Year Ago: Stuffed Chicken with Goat Cheese, Sundried Tomatoes and Basil

Whole-Wheat Pasta Salad with Zucchini and Olives
(Recipe source Gourmet, July 1994)

Ingredients:

1 1/2 pounds vine-ripened tomatoes, chopped
1/2 cup red onion, finely diced
2 garlic cloves, minced and mashed to a paste with 1 teaspoon salt
2 tablespoons red-wine vinegar
1/4 cup extra virgin olive oil, plus additional for brushing  zucchini
1 1/2 pounds zucchini, cut diagonally into 1/3-inch-thick slices
1 pound whole-wheat penne or other tubular pasta
2/3 cup Kalamata or other brine-cured black olives, coarsely chopped
6 ounces ricotta salata or feta cheese, crumbled
1 1/2 cups whole small or torn large fresh basil leaves

In a large bowl gently stir together tomatoes, onion, garlic paste, vinegar and olive oil. Set aside.

Brush one side of zucchini slices lightly with additional oil and season with salt and pepper. Heat a well-seasoned ridged grill pan over moderate heat until hot and grill zucchini, oiled sides down, in batches, brushing tops with more oil before turning, 1 to 2 minutes on each side, or until just tender but not soft. Transfer to a small bowl.

In a pot of salted boiling water cook pasta until just tender (following package directions) and drain. Add hot pasta to tomato mixture and toss to combine. Cool pasta slightly and stir in zucchini, olives, cheese, basil and salt and pepper to taste.

Serve warm or at room temperature.

Yield: 8 servings

Read Full Post »

68 Days of Gourmet: Day 64

My most sincere apologies for the lack of updates over the last couple weeks. We closed on our first home and have been moving. Life is a little crazy right now! We LOVE our new house and are having so much fun getting everything unpacked and organized. The house hunting process was long with a lot of ups and downs but we really feel like we ended up with the perfect first home! Pictures of my new kitchen to come very soon.

I made this mushroom appetizer before we moved out of our apartment. It was also from the July 1946 issue of Gourmet (check out my previous post – Veal (or Pork) Scallopine – also from the 1946 magazine). They were a fun appetizer – Brandon loved them!

Promise I have tons of good stuff coming at you guys over the next few weeks. Stay tuned!

Mushroom Smetana
(Recipe source Gourmet, July 1946)

*Note – this is word-for-word how the original recipe was written. Crazy how different recipes were written then!

One fairly fancy hot whet which I dug into in the Shanghai-that-was is so good that we list it here. Never a gourmet-purist yet who didn’t want the recipes, once he tasted it. I call it Mushrooms Smetana – mushrooms with sour cream sauce – as did the Russian princess who was our dance partner for that night…Slice 1/2 pound of fairly small mushrooms fairly thin. Brown gently in 1 1/2 tablespoons butter. Mince one fairly large onion (we seem to be using a lot of “fairly’s” in this one!) and cook gently in another 1/2 tablespoon butter. (Original recipe said to do them separate, but I put them all together.) Now, turn in enough beef boullion or consomme to make quite moist, but not quite enough to cover. Simmer until mushrooms are tender. Work in 1 tablespoon of flour smooth with a little hot juice, put in pan and season with salt and cayenne to taste. Add 1 scant cup of sour cream (now buyable from any good town dairy); simmer up for 5 minutes. Serve hot on little squares of thin crisp toast. We add 1 tablespoon sherry just before serving.


Read Full Post »

68 Days of Gourmet: Day 62

Regardless of whether you want to make this dish – you MUST scroll down and read the recipe. I guarantee you that you have never read anything like it! My in law’s were so thoughtful to give me a copy of the July 1946 issue of Gourmet for Christmas this year (knowing about the 68 Days of Gourmet project).

The style of the old issue is so interesting. All of the recipes are written into stories. I’ve so enjoyed reading through it!

I picked a few recipes from the magazine to make during the last few days of the project. This Veal Scallopine sounded good and I just couldn’t get over the way the recipe was written. I had to share. I think you’ll be very surprised to find that the recipe calls for cream of mushroom soup. I generally avoid buying “cream of” soups but had to make an exception for this recipe. Also, I originally was going to make this with veal but couldn’t find it at our local grocery and in the end wasn’t comfortable purchasing it anyway. I read online that pork tenderloin is a good substitute so I decided to go that route.

I sliced the pork tenderloin on a diagonal into rounds and then pounded it thin. I think it was a perfect substitution for the veal. It became so tender during the slow cook.

Overall, this recipe was very good. The only change/alteration I would recommend is reducing the salt. The chopped olives in the dish and sherry stirred in at the end really added a lot to the overall flavor. A fun throwback from Gourmet!

Veal (or Pork) Scallopine
(Recipe source Gourmet, July 1946)

*Note – this is how the original recipe was written. I had fun following it! Take into account that this was part of a special boating section.

Believing that beef and steaks and things, barring fodder for stews and such, will continue to be scarce, stringy, bony, and tough, lets’ turn to a simple yet delicious veal scallopine – for veal’s not tough and never cheats you with many bones. Pound veal steaks firmly but evenly with wood mallet, flat of chef’s knife, or dinghy paddle, until about 2/3 original thickness. Trim out sinews, membranes, and gristly bits, and cut into serving size before cooking. Dredge with flour. Heat about 3 tablespoons of olive oil in Dutch oven on top of stove. In center of this put 1 level teaspoon of fresh-made garlic salt – tossing the rubbed-down nubbin of the garlic clove in also, to fizzle for a few moments before casting overside. When salt is lightly brown, put in your veal steaks. brown lightly golden on both sides. Now cover with canned cream of mushroom soup until meat is hidden. Toss in 4 bay leaves, a handful of chopped ripe olive meat, 1 tablespoon minced pimento. Step up with hand milled black pepper and 1/2 teaspoon of Worcestershire, 1/2 teaspoon of origanum (the wild marjoram so beloved by all Mediterranean chefs), sweet marjoram, or basil – rubbed between palms. (Buyable under my friend Pat Winter’s House of Herbs label in all good stores, or write House of Herbs, Juniper Hills, Canaan, Connecticut, for her complete listing of hers, wine vinegars and all such.)

Go up on deck and sip your cocktail with the guest who matters most, simmering veal very slowly the while, with cover on tightly. (Use an asbestos disc if stove tends to be too brisk.) When veal is tender as a lovely lady’s sigh, top off by turning in 1 tablespoon of sherry for each 2 servings. Stir up sauce well and toot your dinner horn. A cold bottle of Gret Western sauterne, or perhaps one of Meier’s fine Sadusky Island sauternes from Ohio; or, as we happen to prefer with Italian type foods like this, a red (served cool, not cold), Louis Martini’s Nappa Barbera, a fruity lusty thing beloved in the Italian Piedmont, or his Sonoma Zinfandel, which when grown in higher altitudes gains a delicate softness and charm.

Read Full Post »

68 Days of Gourmet: Day 61

Gourmet named this recipe Spicy Boiled Crabs, Shrimp, Potatoes, Corn and Garlic. I put a Southern spin on it by subbing sausage for the crabs and calling it by its true name, Lowcountry Boil. I think the crabs would have been a fun addition but not in the realm of  possibility for tonight’s dinner.

Lowcountry Boil is a simple, one-pot dinner full of deliciousness. We served it at our rehearsal dinner when we got married in Charleston and requested it for our joint birthday party last year. It’s a great party/entertaining dish but also fun and easy for any night! You can easily scale the amount of ingredients to the number of people you’ll be serving. It’s also easy to control the spice level. If you love spicy foods, feel free to be a little heavy-handed with the seasonings. You cook this in such a big pot that the spices are really diluted.

It’s also relatively healthy and filling. We usually sub chicken or turkey smoked sausage. My favorite way to serve Lowcountry Boil is on a big platter so everyone can pick and choose what they want. And really hot homemade cocktail sauce (the more horseradish, the better!) on the side.

If you’ve never experienced Lowcountry Boil it is a must try this Spring/Summer. Perfect for your next get together – casual, a little messy and fun! I can just picture serving this outdoors with rolls of paper towels and sweet tea in mason jars – what can I say? I was definitely born and raised in the South!

One Year Ago: Easy Spanakopita

Lowcountry Boil
(Recipe adapted from Gourmet, June 1996)

Ingredients:

2 (3-ounce) packets Zatarain’s crab boil or 5 tablespoons Old Bay  seasoning (or more – adjust to taste)
1 tablespoon cayenne (or more adjust to taste)
1/2 cup table salt (might want to reduce to around 1/4 cup)
3 lemons, quartered
2 onions, halved
1 1/2 pounds small potatoes (about 2 inches in diameter)
2 whole heads of garlic (not separated into cloves)
6 ears of corn, shucked and halved
24 ounces smoked sausage (2 packages), cut into 2 inch pieces
2 tablespoons Old Bay Seasoning, or to taste, for sprinkling over  boiled seafood
3 pounds large shrimp (about 30, preferably with heads)

Directions:

In a very large stock pot or kettle (7- to 8-gallons) bring 5 gallons water to a boil.

Add Zatarain’s crab boil or 5 tablespoons Old Bay seasoning, cayenne, salt, lemons and onions to boiling water and boil 5 minutes. Add potatoes and garlic and boil for about 10 minutes. Add corn and sausage and cook for about 5-10 more minutes, until corn and potatoes are tender.

Add shrimp and cook until they turn bright pink, about 2-3 minutes, careful not to overcook. Drain pot and transfer to a platter. Sprinkle with Old Bay seasoning and serve with cocktail sauce.

Yield: 6 servings

Read Full Post »

68 Days of Gourmet: Day 60

I wanted to include a couple more vegetable/side/meatless dishes in the 68 Days of Gourmet project. I flipped through The Gourmet Cookbook vegetable dishes and Peas with Spinach and Shallots looked like a great choice for Spring. It took less than 15 minutes to put together, was a nice change from plain peas or spinach and looked pretty on the plate. I find myself repeating the same sides over and over so it was good to try something new that was so easy and manageable on a weeknight!

One Year Ago: Grilled Sweet Potato Slices

Peas with Spinach and Shallots
(Recipe source The Gourmet Cookbook, published in Gourmet January 2002)

Ingredients:

2 medium shallots, thinly sliced
2 garlic cloves, thinly sliced
1 tablespoon vegetable oil
1 tablespoon unsalted butter
10 ounces frozen peas
1/4 cup water
5 ounces baby spinach
3/4 teaspoon salt
1/4 teaspoon black pepper

Directions:

Heat a 12-inch nonstick skillet over medium heat. Add oil and butter and heat. Add shallots and garlic and cook, stirring frequently, until soft 3-6 minutes.

Stir in peas and water and cook, covered, stirring occasionally, until peas are tender, about 5 minutes. (Note that you might want to start with a little less water and add more if necessary.)

Stir in spinach, salt and pepper and cook, tossing, until spinach is just wilted, about 1 minute.

Yield: 4 servings

Read Full Post »

68 Days of Gourmet: Day 59 (final stretch!!!)

These Chile Crusted Tuna Tacos felt like a great choice for a warm spring night. They were a light and refreshing dinner paired with sangria and Black Bean and Quinoa Salad. Tuna is one of our favorite fish choices and I was eager to try it in fish tacos instead of our usual Asian preparations (like this and this).

Although the recipe required preparation of several different elements, it still felt relatively simple to prepare. I was able to take my time with each of the steps and enjoy dicing, simmering and sautéing. The end result was a tasty twist on fish tacos – sweet, spicy, crunchy. Yum!

I was disappointed that I was not able to use the jicama that the recipe called for. It was mushy and moldy at the store. 😦 I ended up making a game-time decision to sub purple cabbage for some crunch. It worked but next time I would definitely do the jicama.

If you’re a fish taco lover or looking for a warm weather spin on tacos, these are a great option!

One Year Ago: Tropical Carrot Cake

Chile Crusted Tuna Tacos
(Recipe source Gourmet, August 2003)

Ingredients:

FOR THE SAUCE
1 cup fresh orange juice
1 tablespoon minced canned chipotles in adobo (including sauce)
1 tablespoon distilled white vinegar

FOR THE TUNA
1 1/2 teaspoons ground coriander
1 1/2 teaspoons ground cumin
1 1/2 teaspoons chili powder
1 1/2 teaspoons cracked black pepper
1 1/2 teaspoons kosher salt
3/4 lb (1 1/2-inch-thick) sushi-grade tuna steak
2 tablespoons olive oil

TO FINISH
4 (9- to 10-inch) flour tortillas
1 cup matchstick (1/8-inch-thick) pieces of jicama (from 1 small jicama, peeled) (I subbed shredded cabbage)
1/4 cup coarsely chopped fresh cilantro (omitted – Brandon will not eat cilantro!!!)
2 tablespoons fresh lime juice
1 firm-ripe California avocado
1 cup loosely packed arugula, coarse stems discarded

Bring orange juice, chipotles and vinegar to a boil in a small heavy saucepan. Reduce heat and simmer, stirring occasionally, until reduced to a generous 1/3 cup, about 15 to 20 minutes. Remove from heat and cool.

Toss jicama with cilantro, lime juice, remaining tablespoon oil, and salt and pepper to taste in a small bowl. Refrigerate until ready to use.

While sauce cools, prepare charcoal or gas grill for cooking. If using a charcoal grill, open vents on bottom of grill, then light charcoal. Charcoal fire is medium-hot when you can hold your hand 5 inches above rack for 3 to 4 seconds. If using a gas grill, preheat burners on high, covered, 10 minutes, then reduce heat to moderately high.

Alternatively, you can sear tuna in a skillet over medium-high heat if you need to cook indoors.

While grill heats, stir together coriander, cumin, chili powder, black pepper and kosher salt in a shallow bowl. Brush tuna on all sides with olive oil and coat evenly with spice mixture.

Grill tuna on lightly oiled rack, uncovered, turning once, until seared on outside but still rare in center, about 2-3 minutes per side. Let tuna stand 10 minutes.

While tuna stands, heat tortillas on grill, turning over once, until warm, about 1 minute, and keep warm, wrapped in foil. Halve, pit and peel avocado and cut into 1/2-inch-thick slices.

Alternatively, sear tuna in pan for 2-3 minutes per side over medium heat and heat tortillas in microwave for 20-30 seconds.

Put a tortilla on each of 4 plates. Divide arugula, jicama mixture and avocado among tortillas, arranging evenly down center of each. Slice tuna 1/4 inch thick and divide among tacos. Drizzle orange chipotle sauce evenly over tuna and serve.

Yield: 4 servings

Read Full Post »

Older Posts »